--


Jump to latest
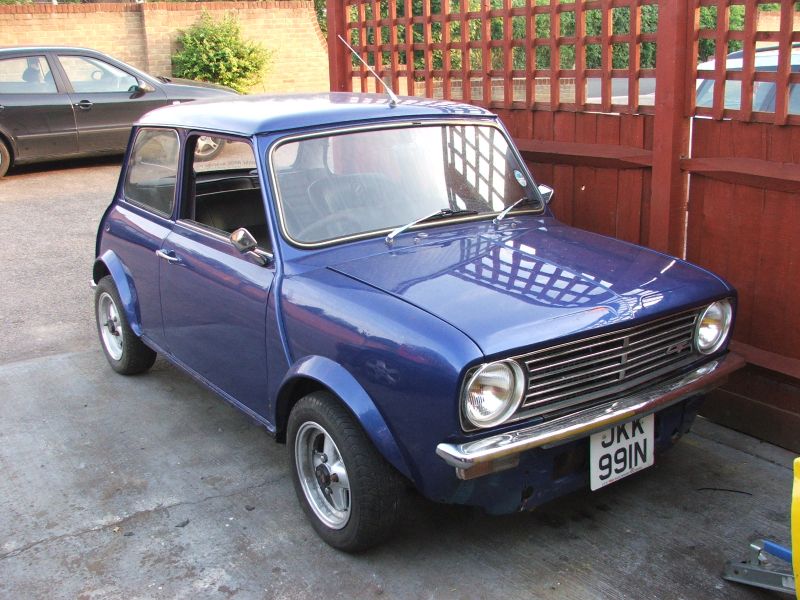
The New Secret Project !
Mr Ed gets more valves...
Edwards MR2 engine transplant.
Task... Stick together a slightly more esoteric 16V Mini than the common as muck Honda/Vauxhall conversions...
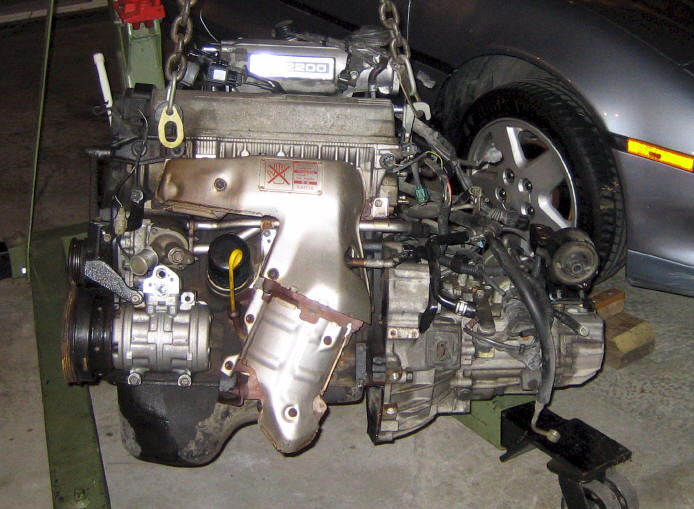
Measured up the engine in Elaine's MR2, just to see if a 2.0 3SGE would fit, but the dimensions all looked a bit keen as the engine is fairly tall and depth of the gearbox and diff seemed a bit tight too, shame coz they do rev nicely !
No - I didn't pull Elanie's engine out for this - it's a pic I found on the interweb! (Of the wrong engine - but you get the idea).
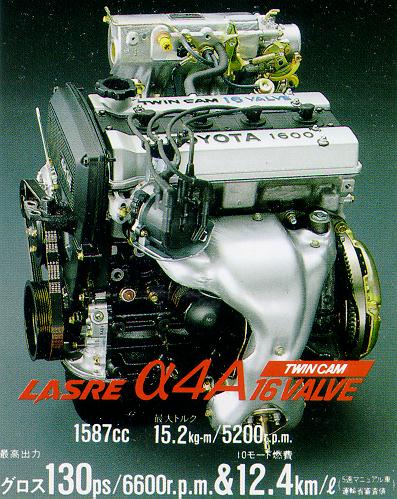
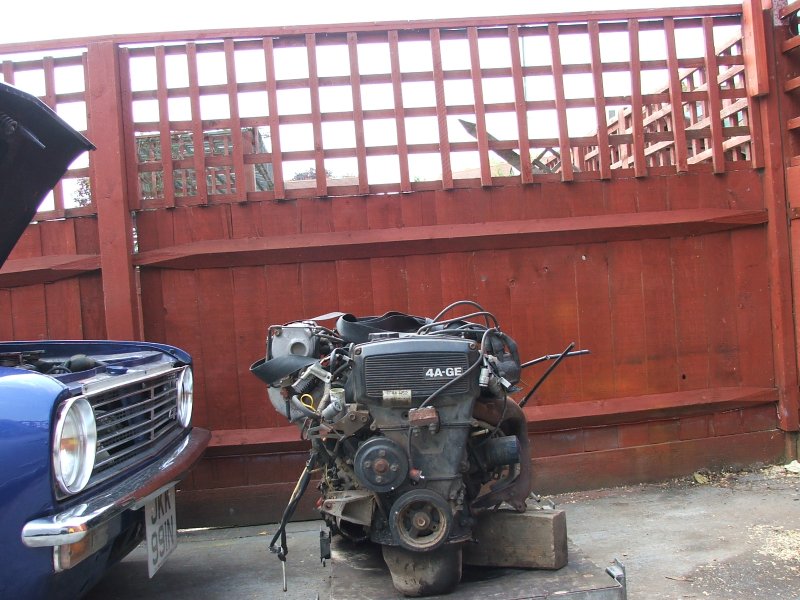
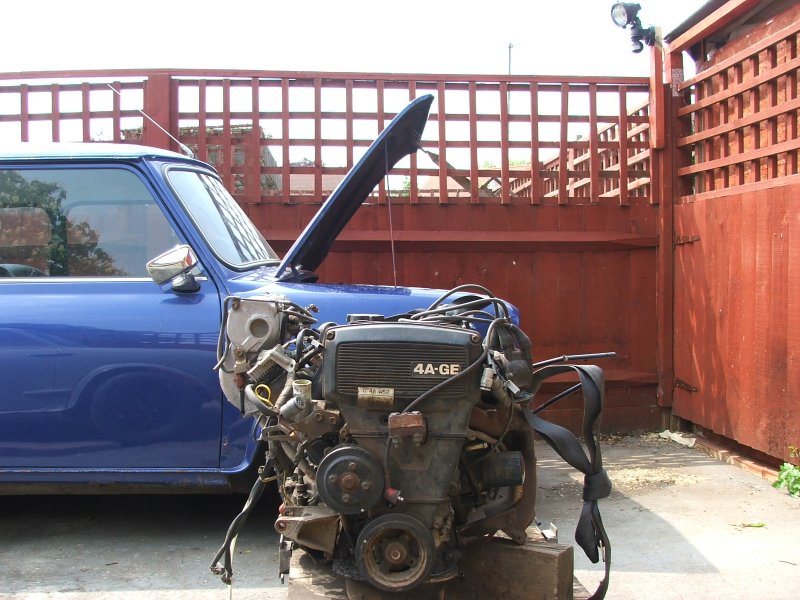
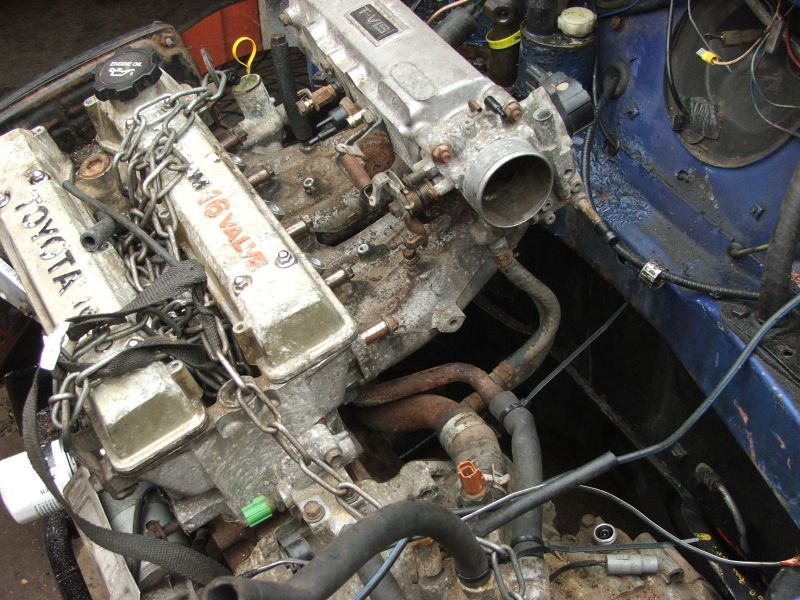
But as a consolation, the 1.6 4AGE engine from the MK1 is a bit smaller, pokes out a respectable 120 bhp, redlines at 7700rpm and has a convenient shape inlet manifold.
7th June
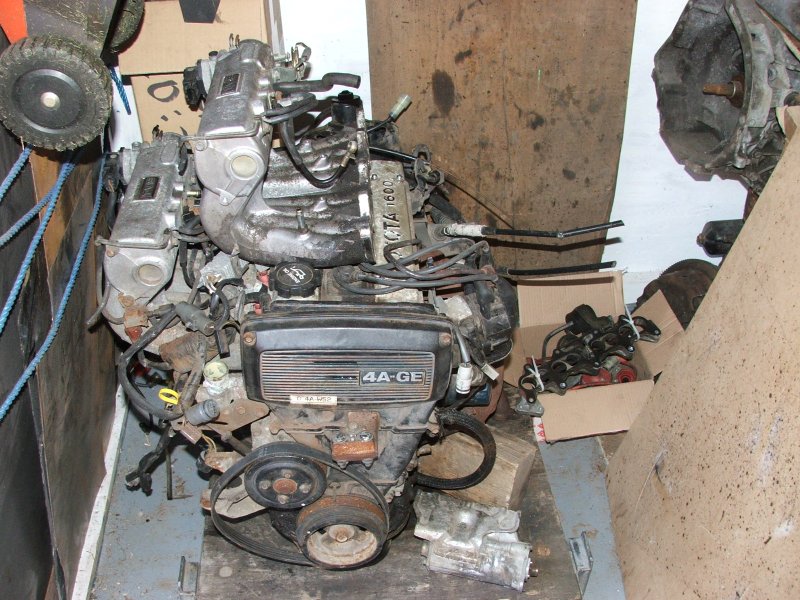
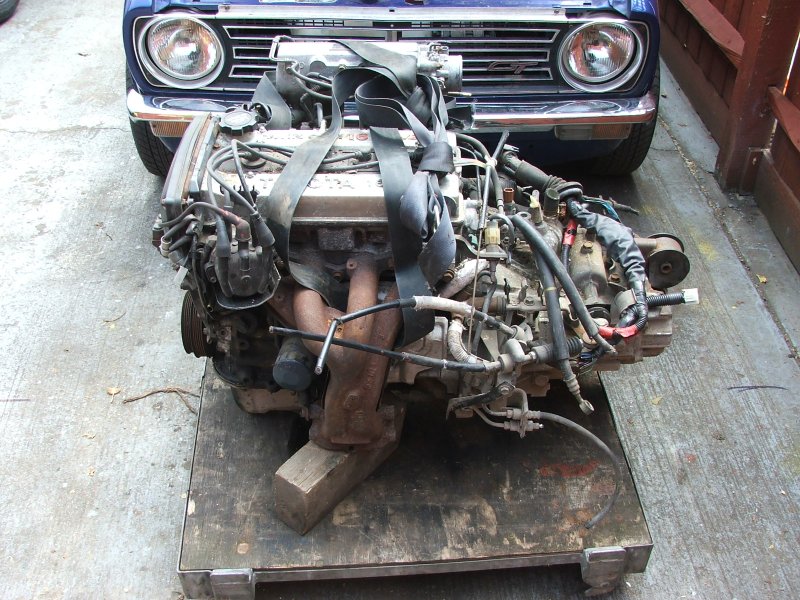
Bought two MK1 MR2 (4AGE) engines & 1 gearbox for the silly sum of £100, the day before another 4AGE without box had sold for £180!!! Don't you just love finding things that have been incorrectly listed so no one else finds them ;-)
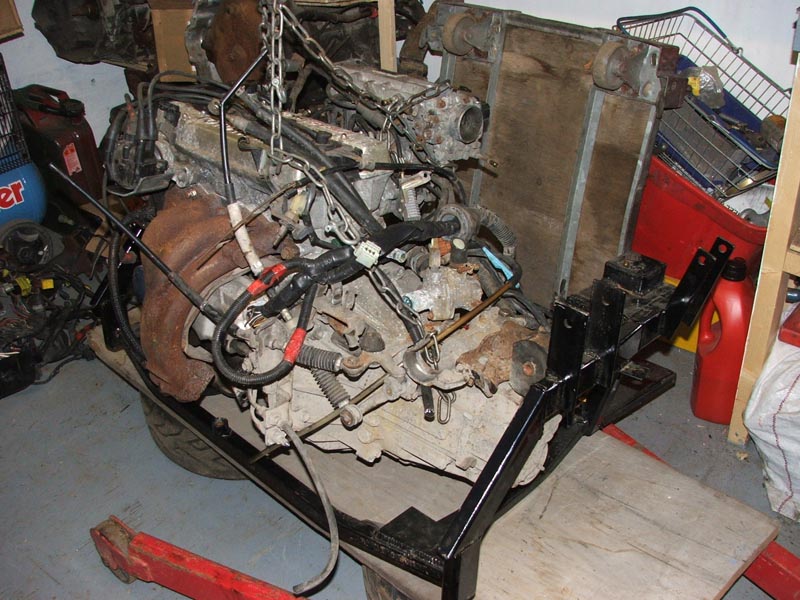
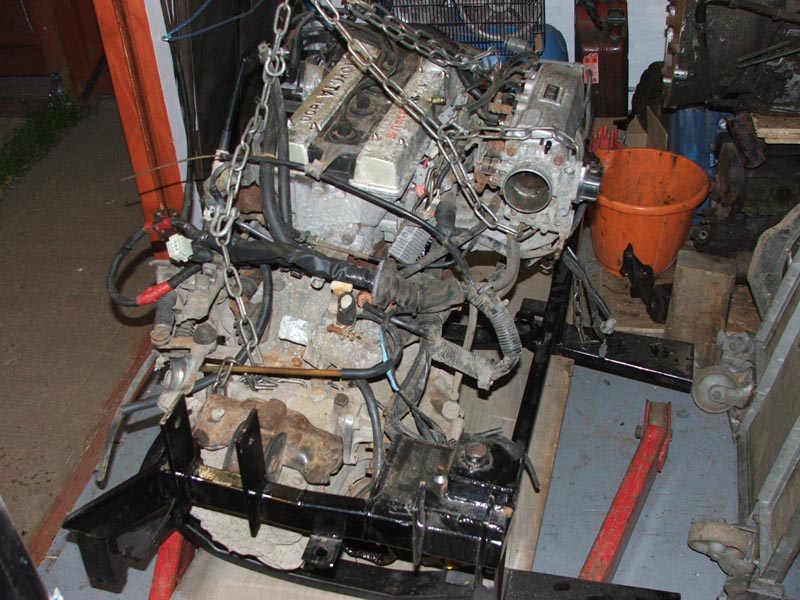
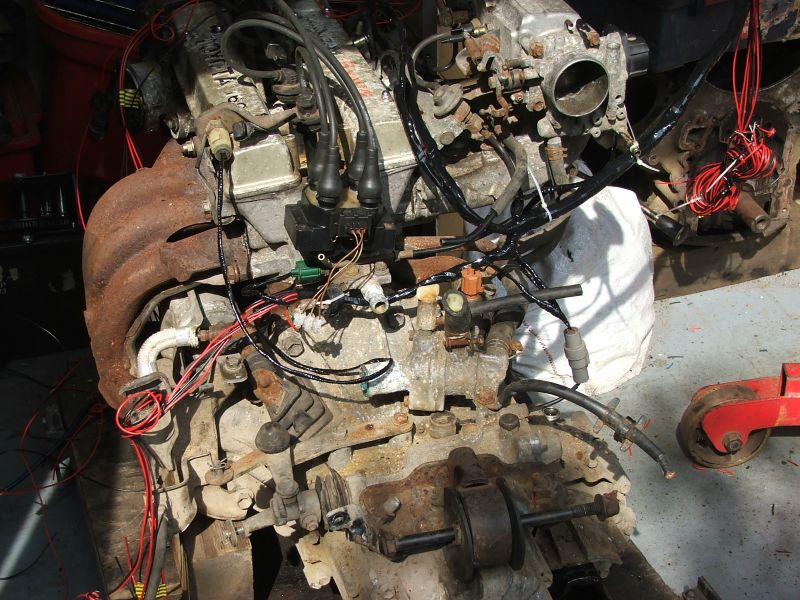
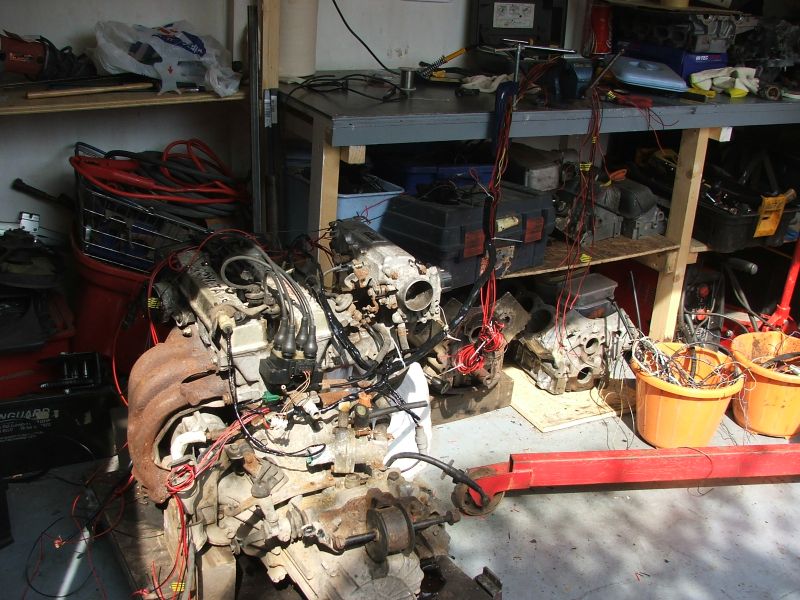
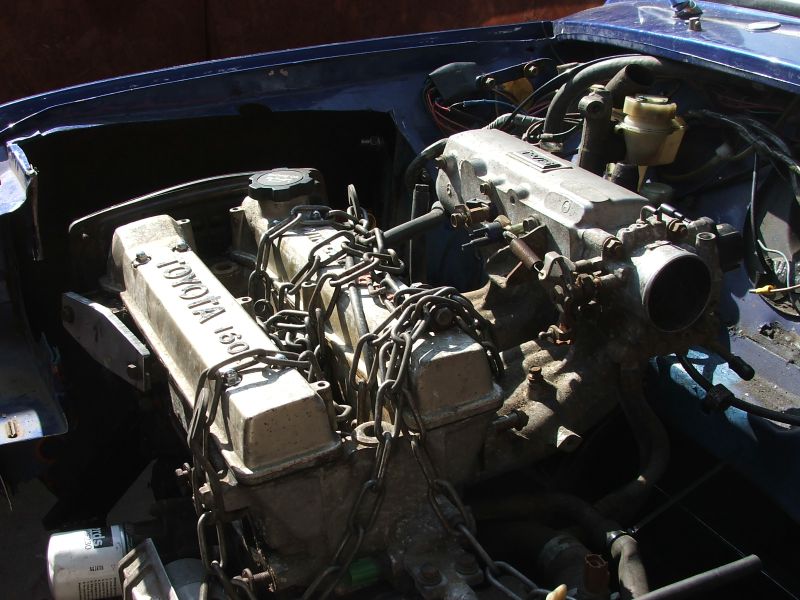
Engine1 and box will stay together for the first fit, while engine2 is being stripped for a rebuild - note the Spagweld engine stand!
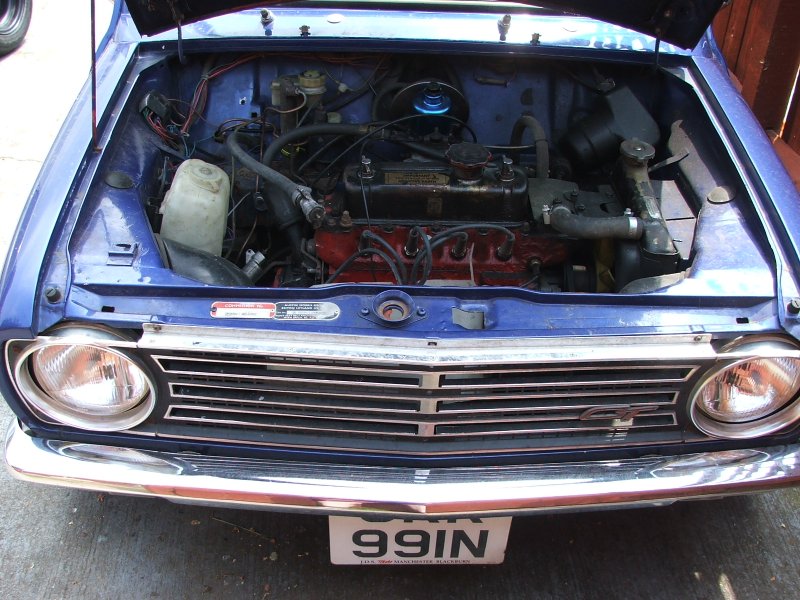
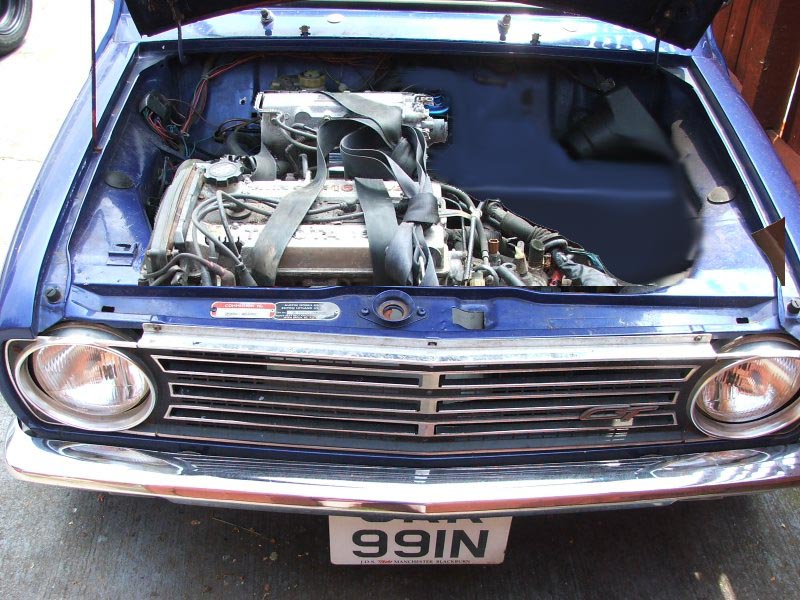
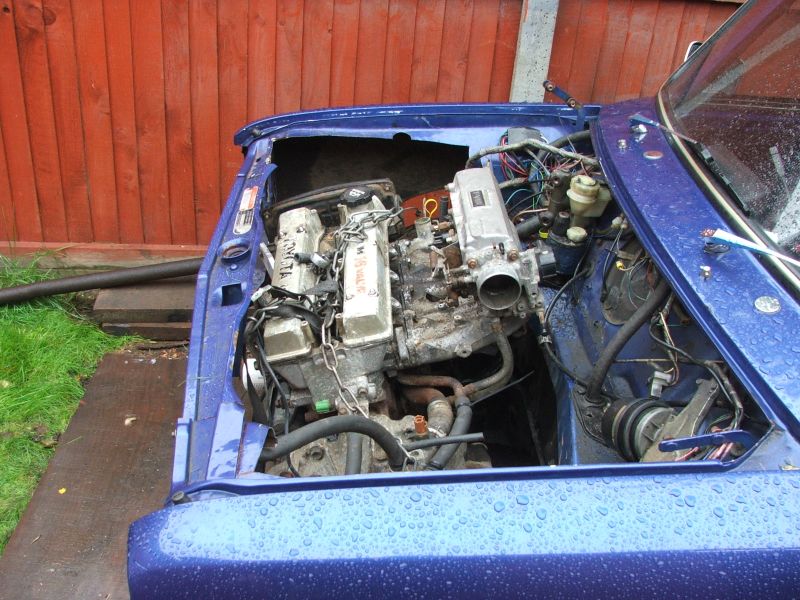
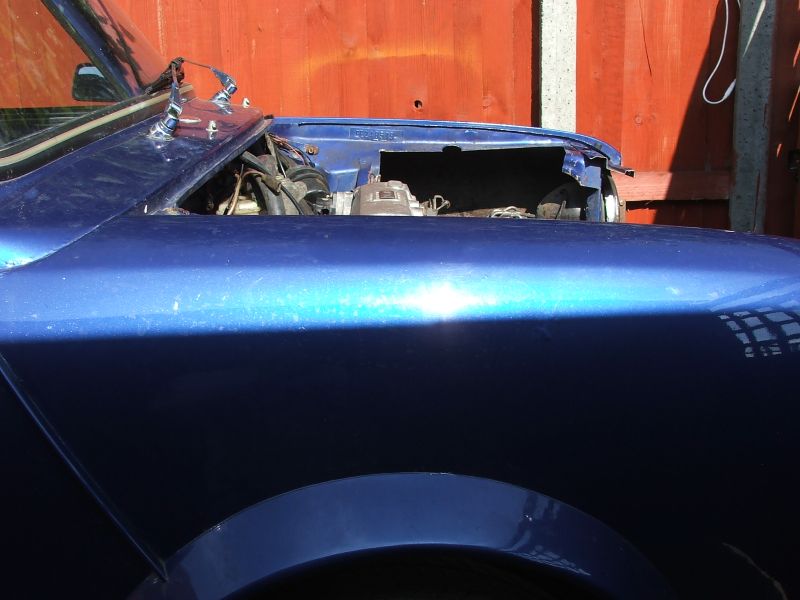
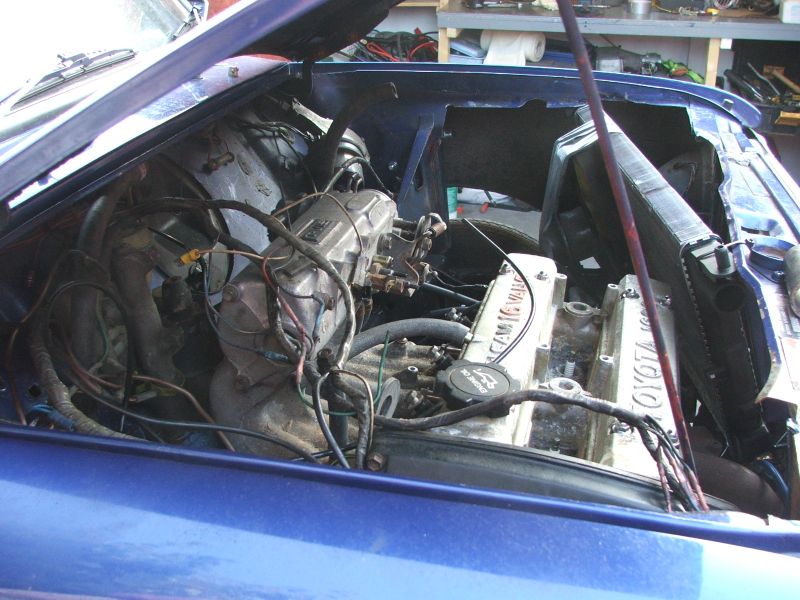
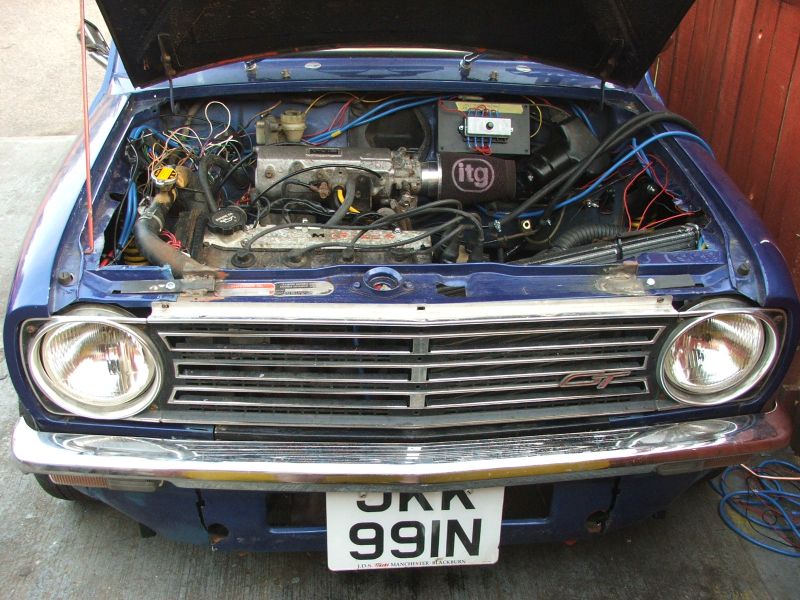
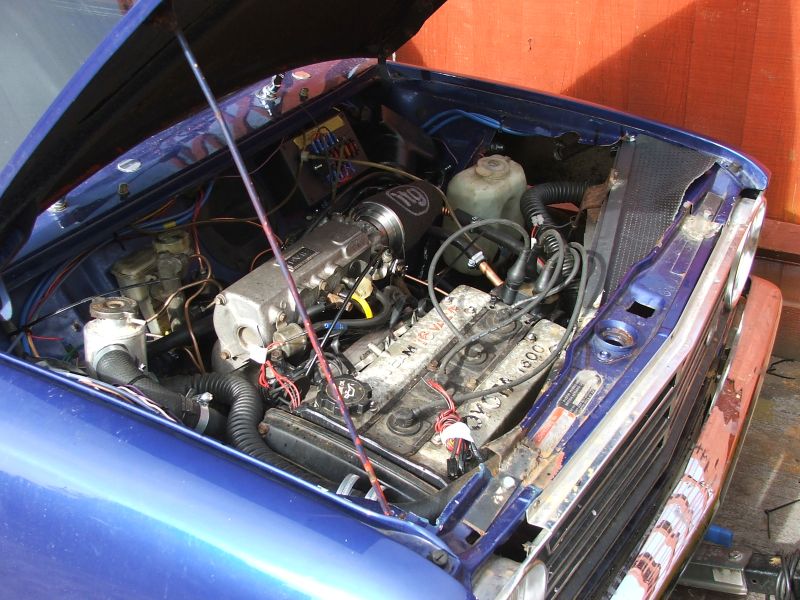
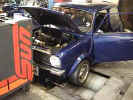
Ed's engine bay and the thing that has to go in.
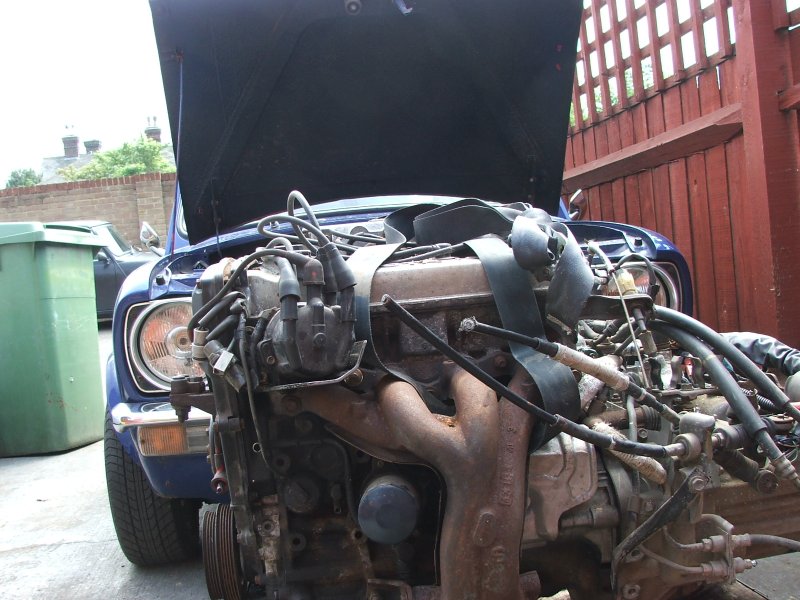
And a quick bit of photoshoppery to join them together!
Engine1 turns over by hand with no scary crunchy noises, and has a nice firm bouncy compression.
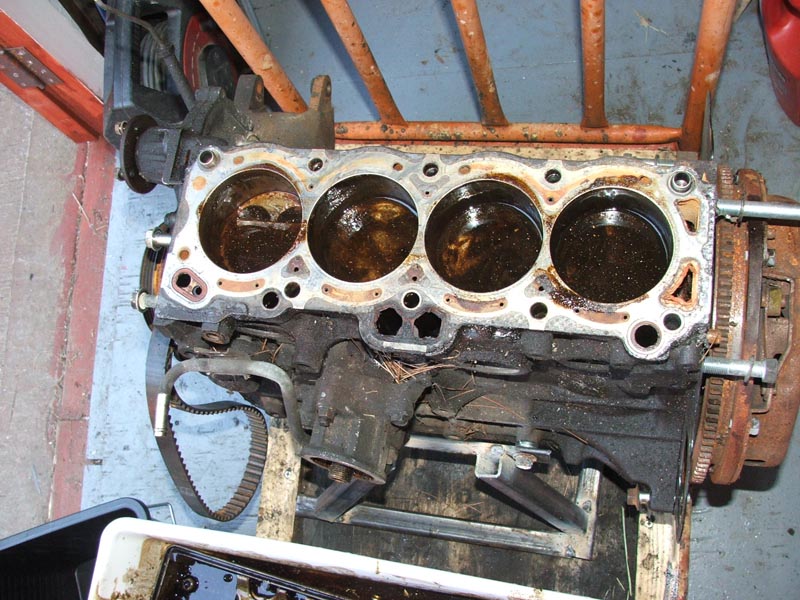
Engine2 turns over just as smoothly, which was a bit of a surprise as it has no plugs and there is a hint of water in one of the cyls. The seller said that the engines had just been outside for about a month, but you never know, do you ?
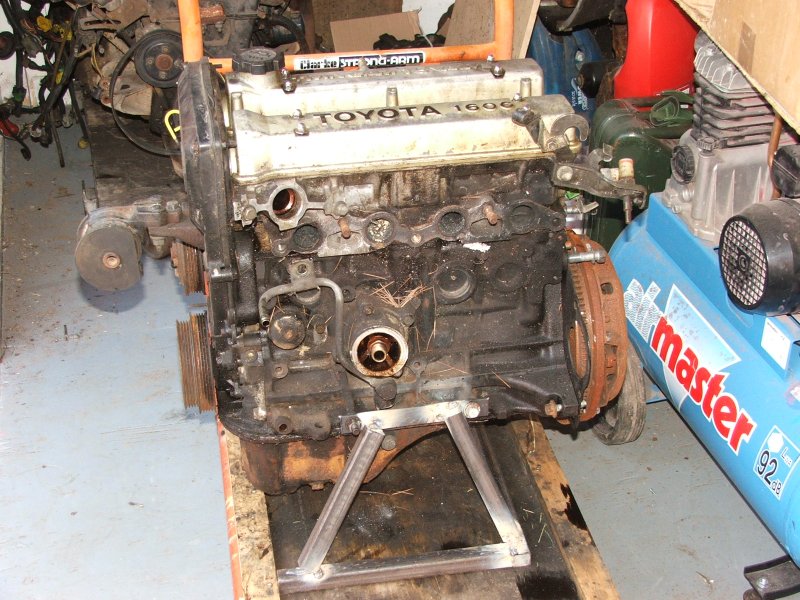
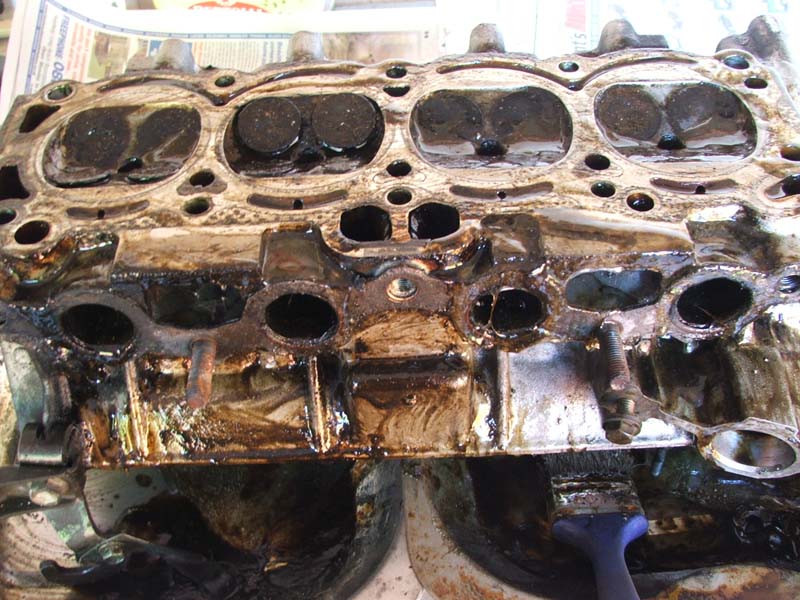
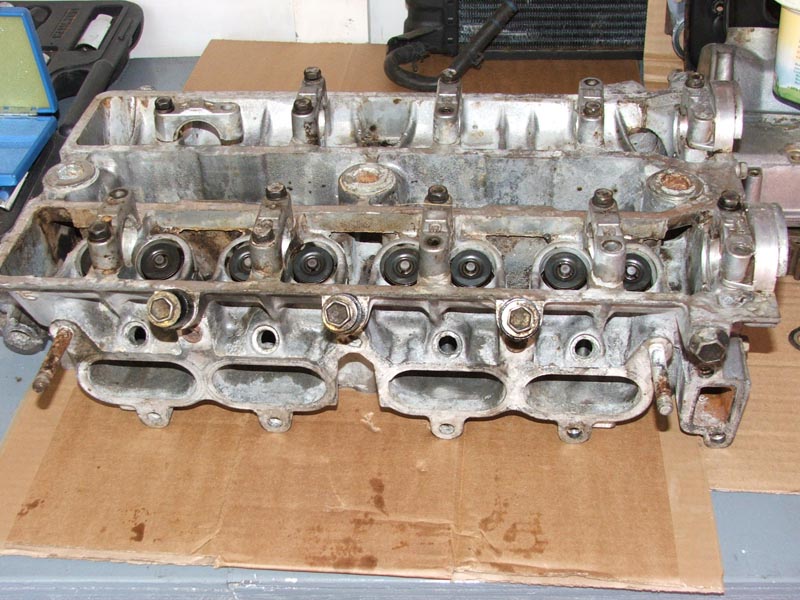
Pulled the head of Engine2 and found a little soft sludge, but no rust or other scary things, so may be OK!
First job is a bit of a clean with some handy shed chemicals...
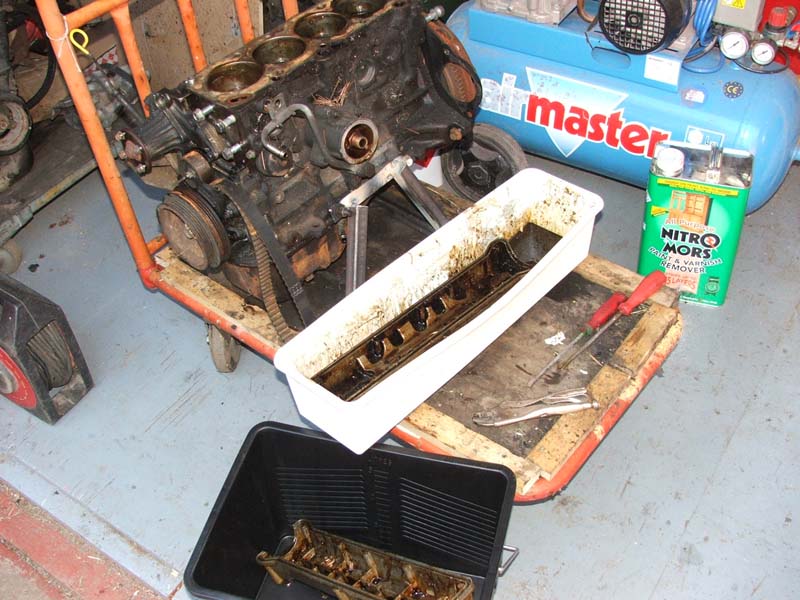
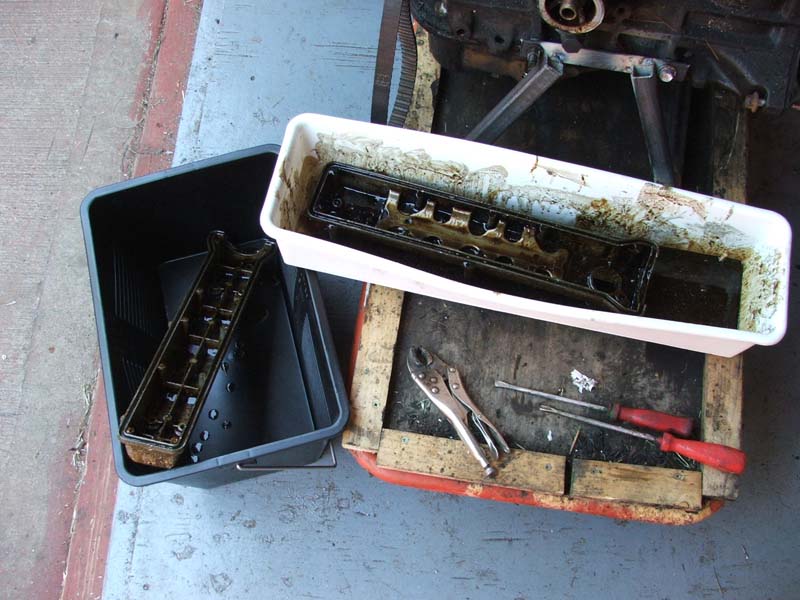

Must remember to rinse the bits before they all fizz away...
9th June
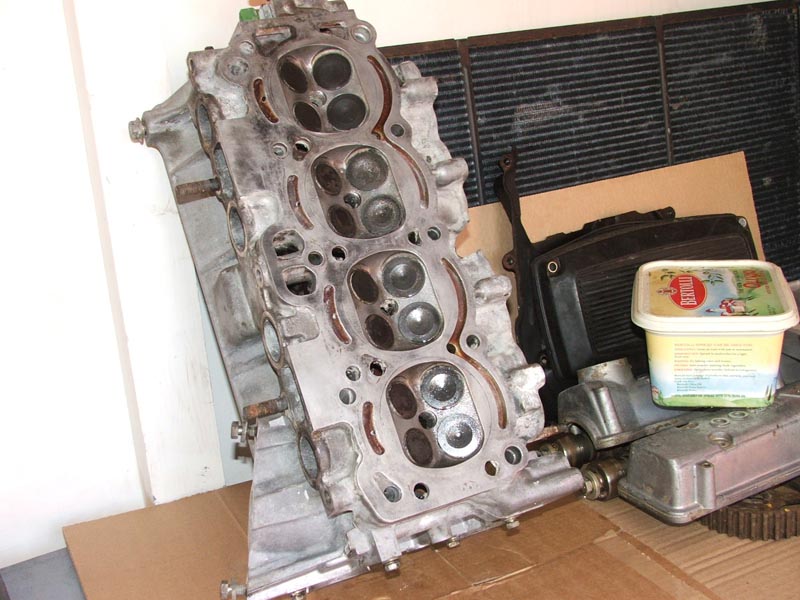
Head has come up pretty well without disolving, and the valves all look pretty good
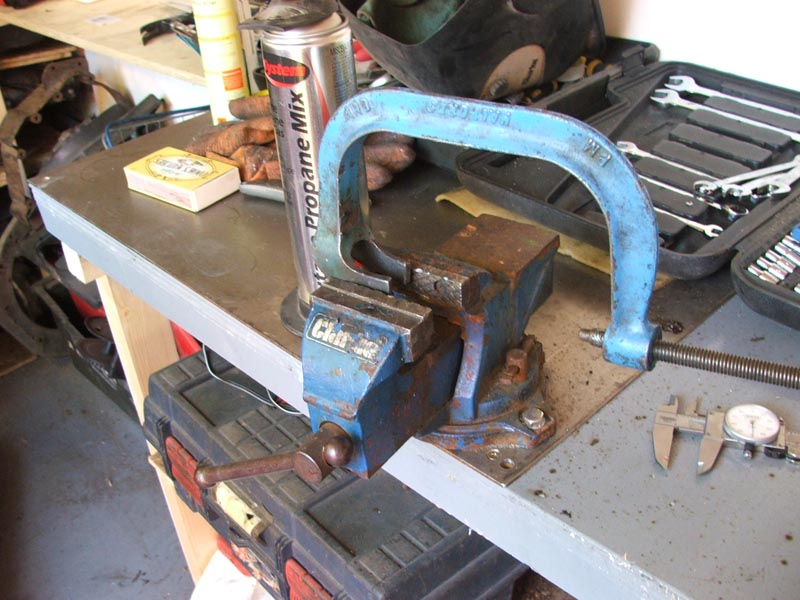
Slight modification to my valve spring compressor coz the Yamaha developed head uses teeny caps & collets to hold the valves in. (Rumour has it that shims for their motorcycle heads are the can be used coz they are the same size...)
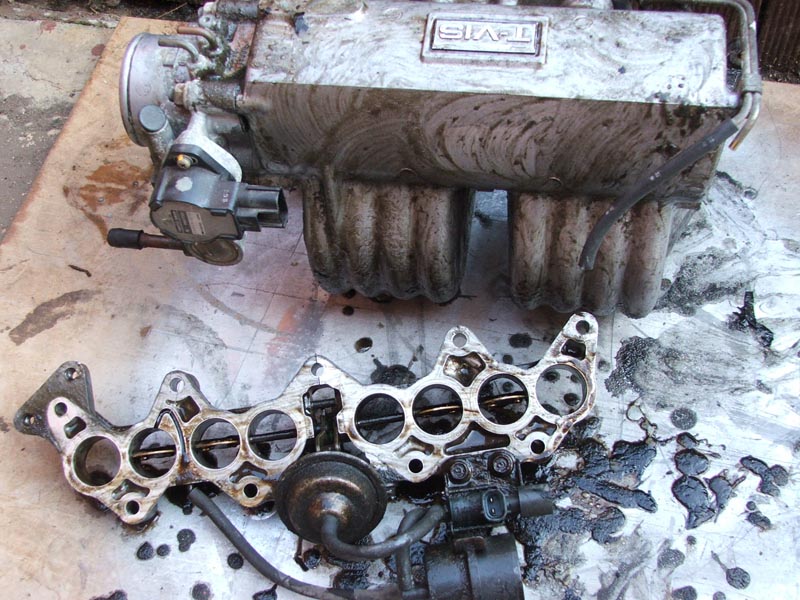
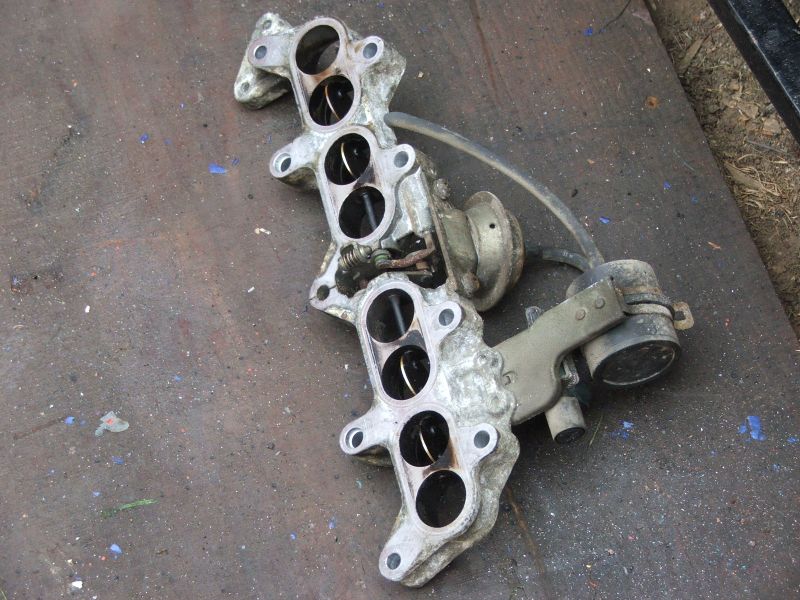
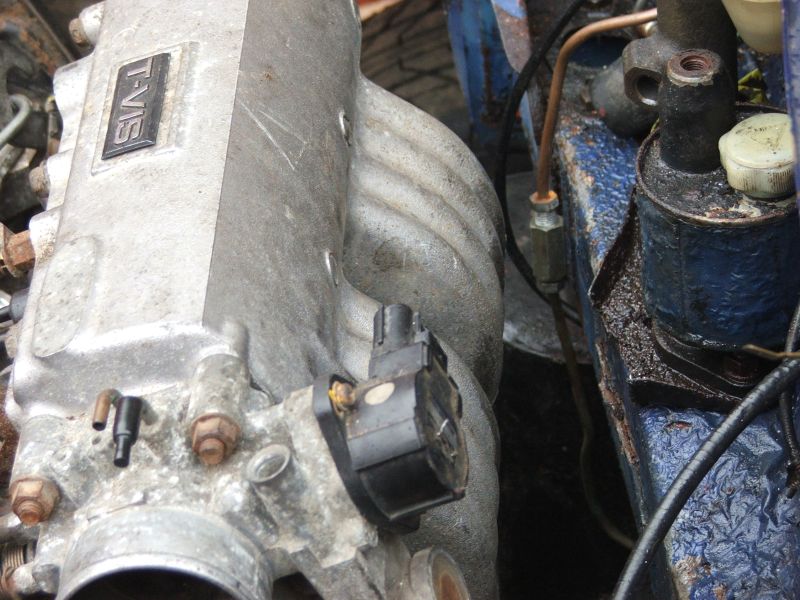
Big inlet ports for the variable inlet thingumies.
Inlet manifold and the variable inlet thingumies being de-cacked.
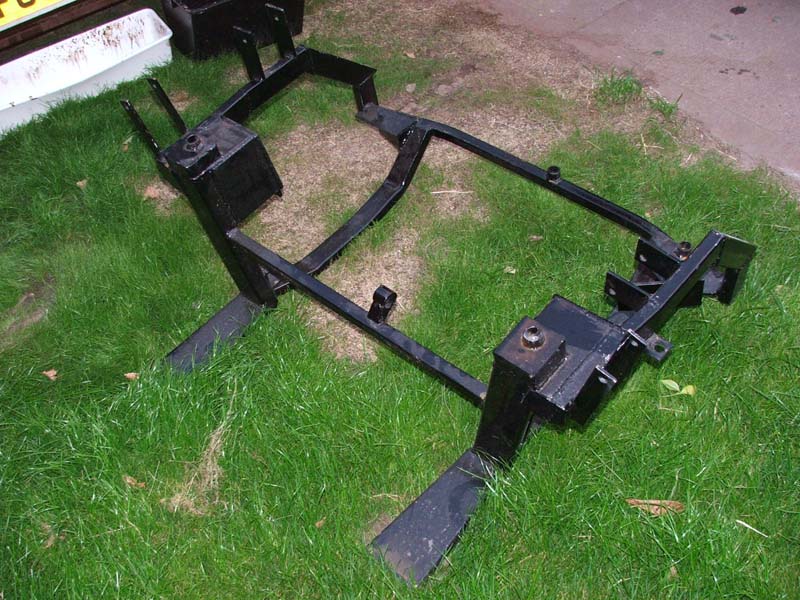
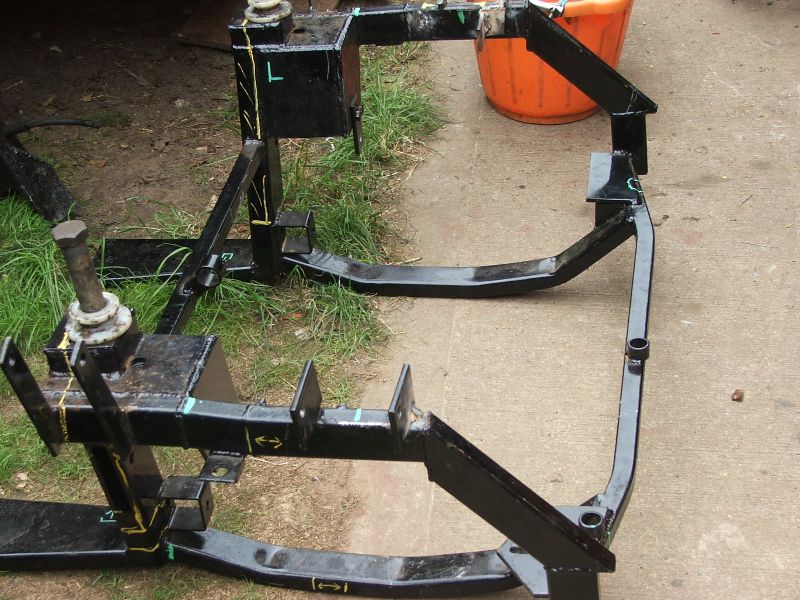
Bought an interesting Honda frame that seems to be loosely modelled on the GoMini one, £400 is a big enough chunk, but will save 3 or 4 days of modding a std subframe, or building one from scratch. Not very pretty, but should do the job :-)
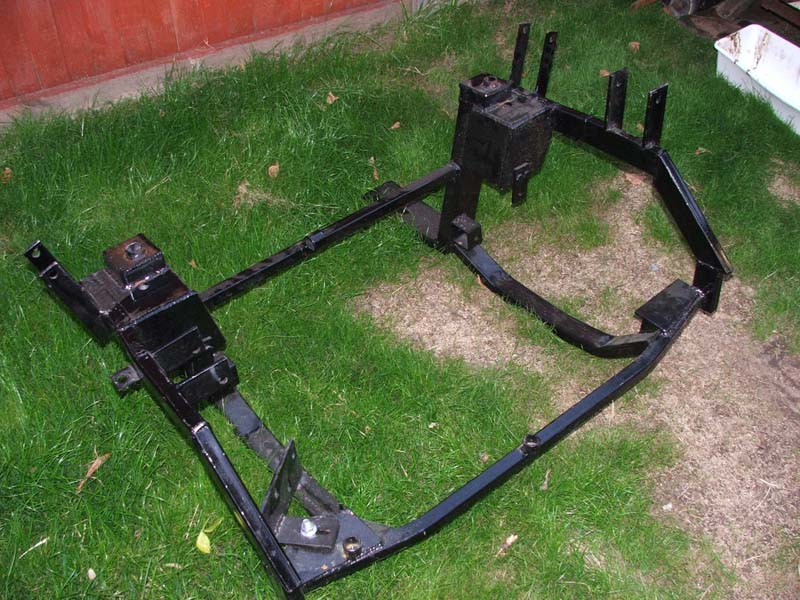
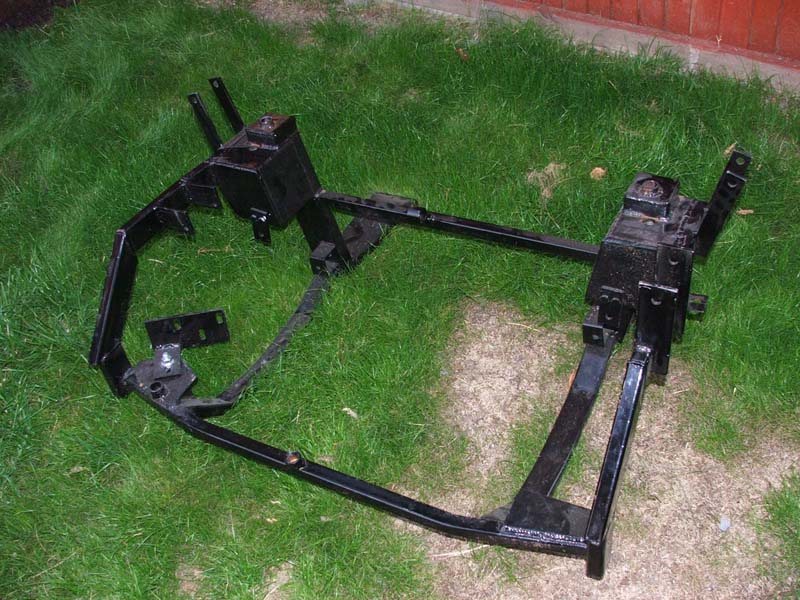
Ha ha, how sooper is that !
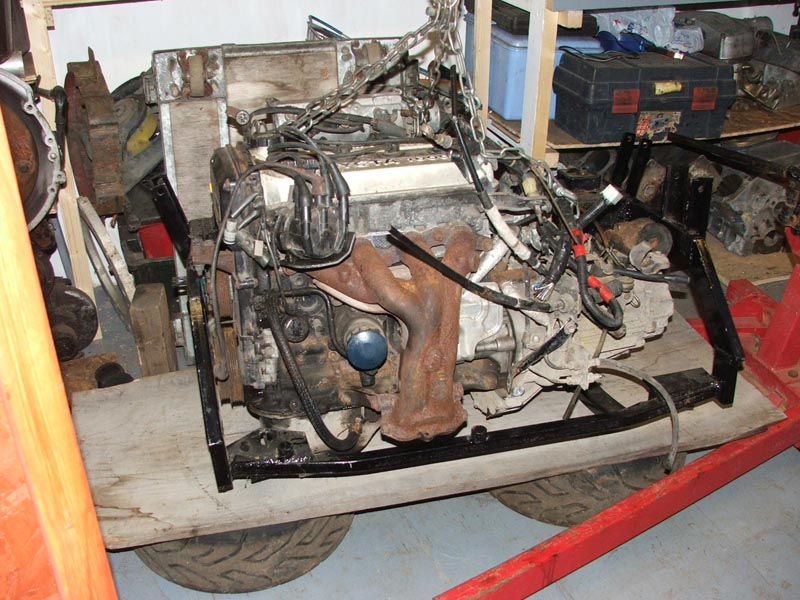
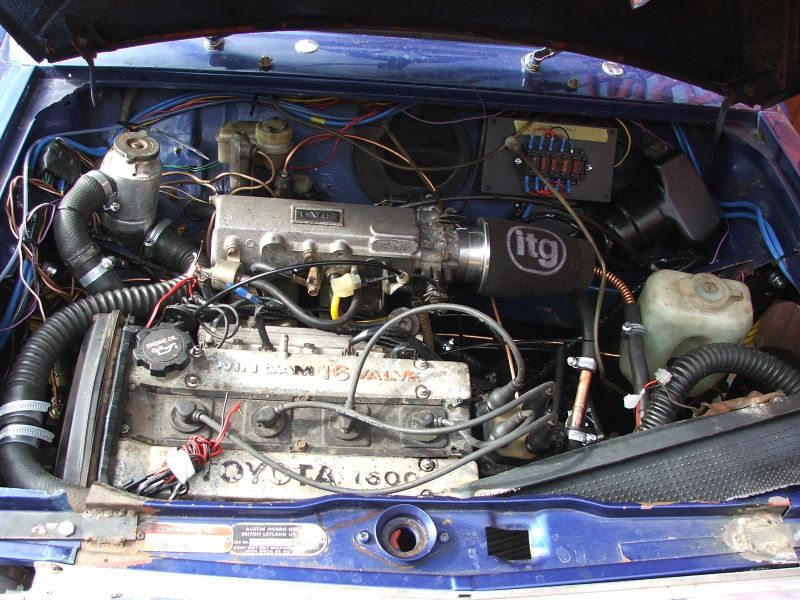
My gamble seems to have paid off, and after 10 mins with the hacksaw to remove one of the Honda mounts, the MR2 lump just slipped in OK.
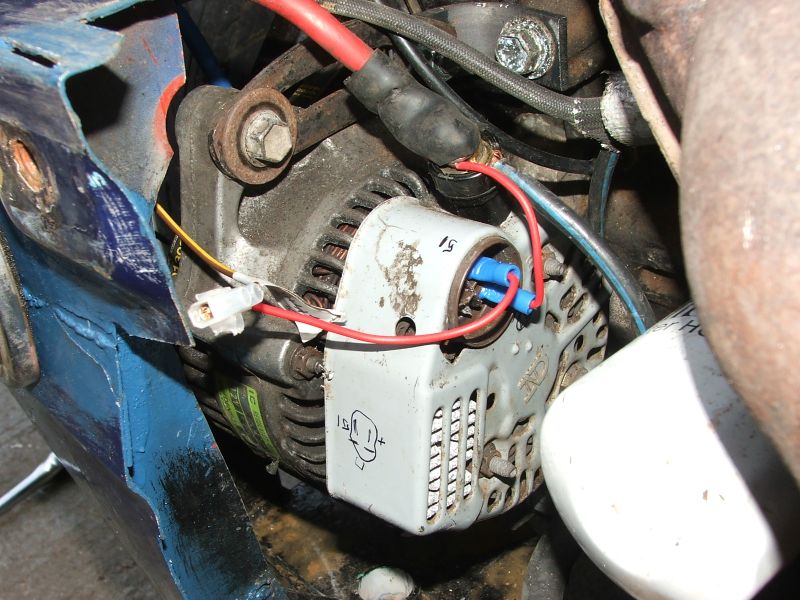
OK, the alternator bracket needs to come off so that the engine can sit further back, then I need to weld up some mounts for the MR2 lump, but all looks promising!
14th June
Decided to use Ford EDIS for ignition so that I can get rid of the dizzy, which may make a bit of room for the alternator to sit on the 'wrong' side of the engine.
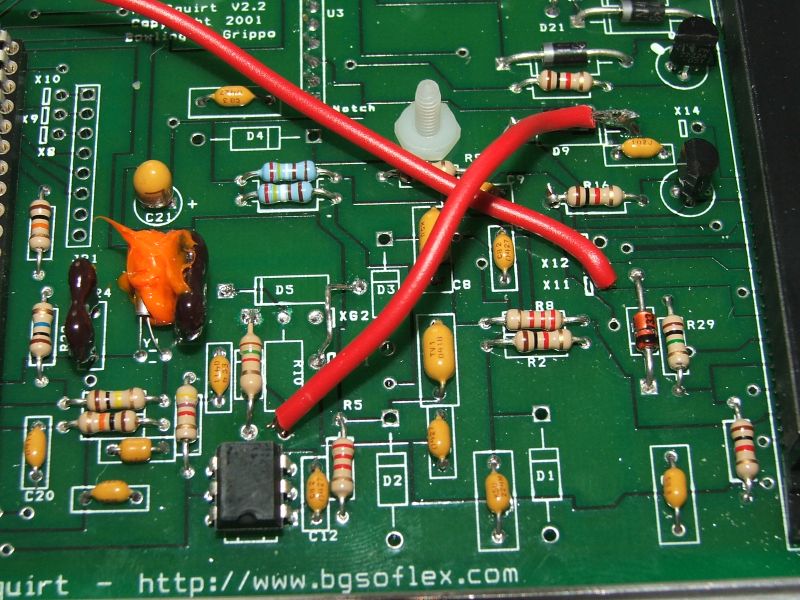
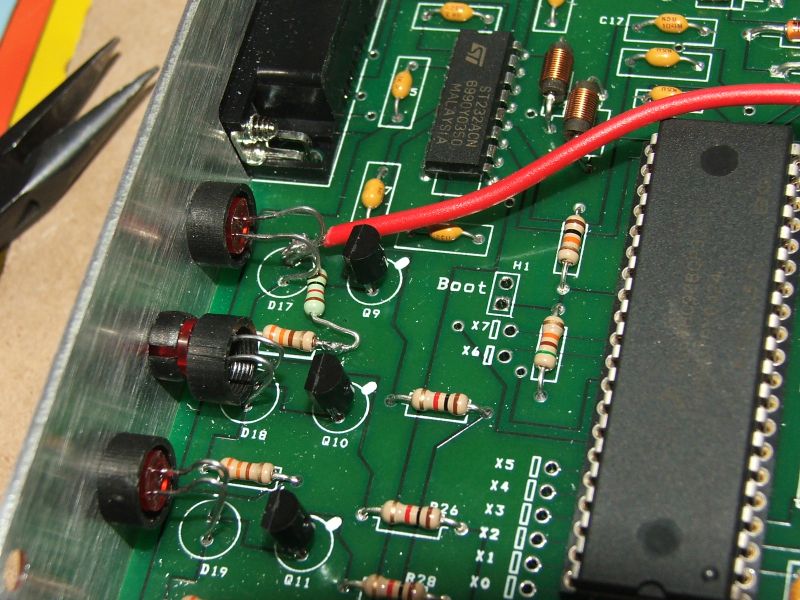
Modified the Pievan's Megasquirt as this one is now going in Ed (poor Pievan!)
A couple of links and some component swapping should mean it's EDIS ready.

16th June
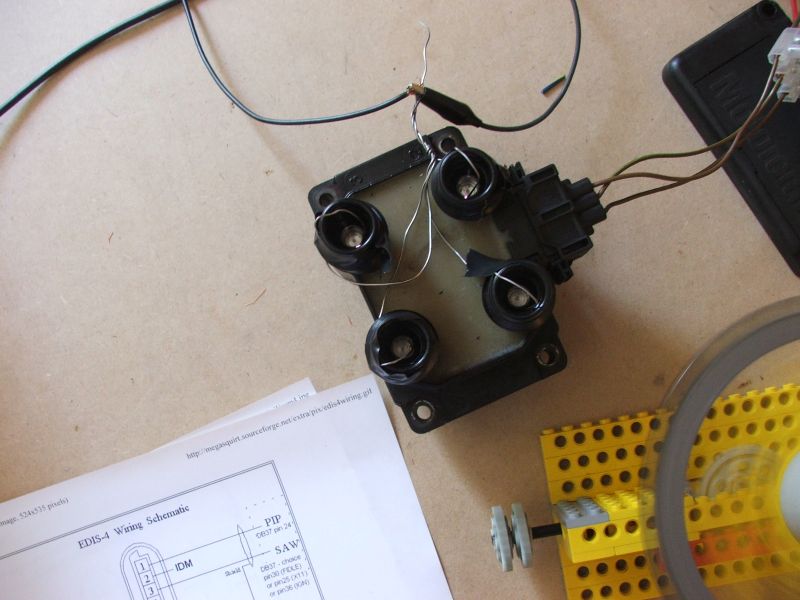
EDIS stuff arrived, and it's rather magic really, plug the module and coil pack together, then 4 wires to make it work. So simple an 8yr old could do it - if they could tear themselves away from the Playstation to dig out the Lego ;-)
Simple test rig to check it all works...
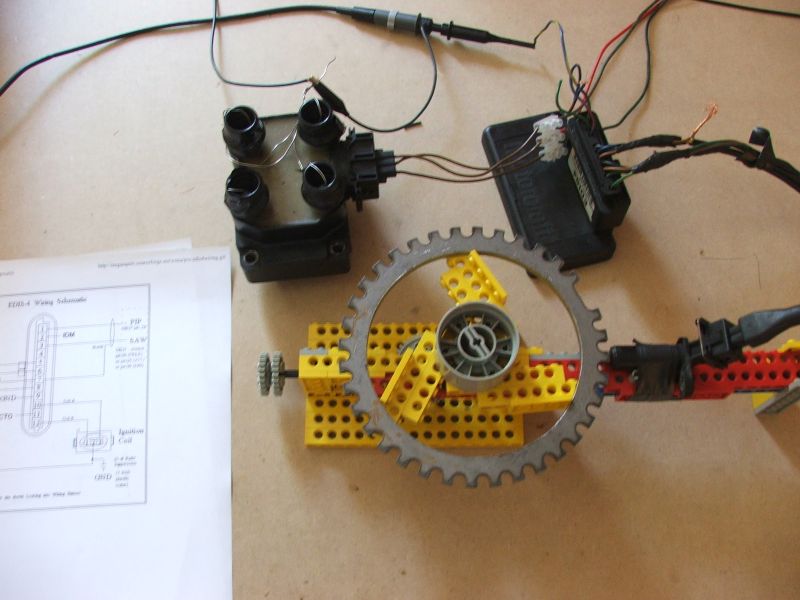
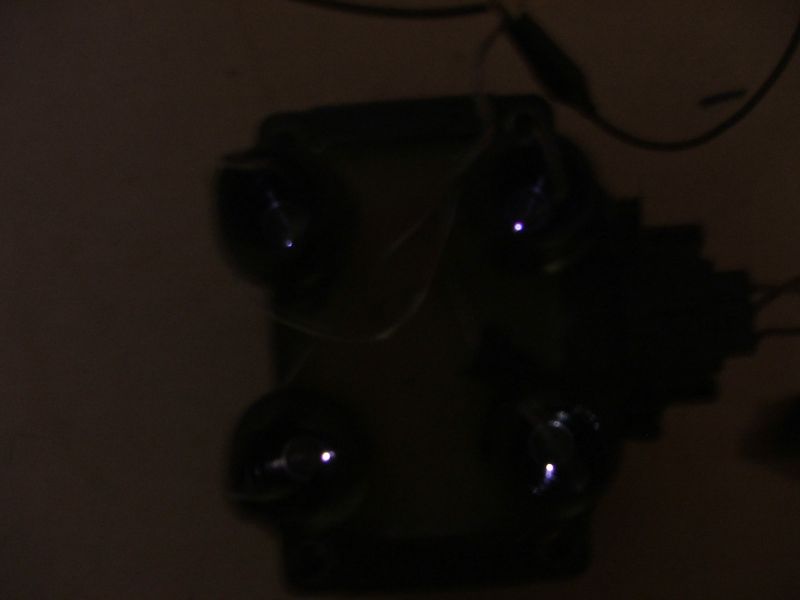
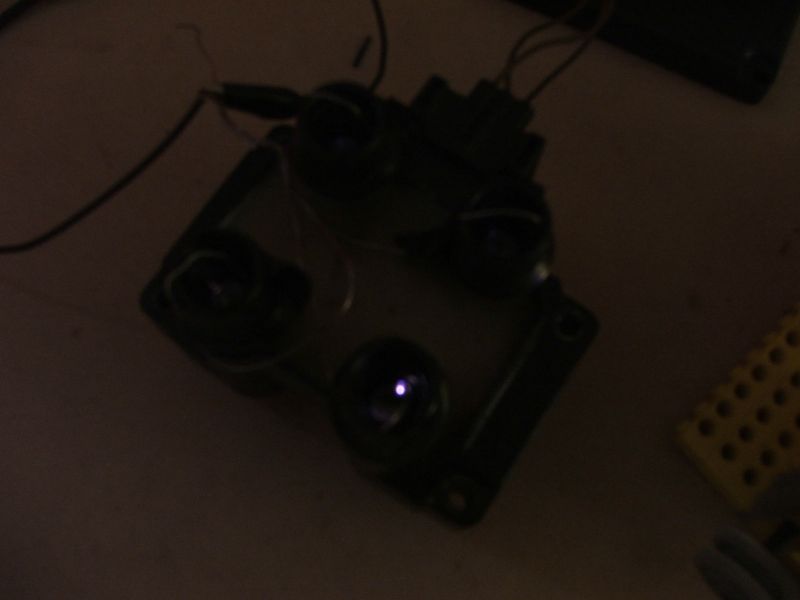
Um, some sparks, meaning that it worked fine !

17th June
Picked up another Ebay gem, a MR2 gearbox for £10, admittedly I paid another £20 for the driveshafts, but not a bad haul fer £30 !
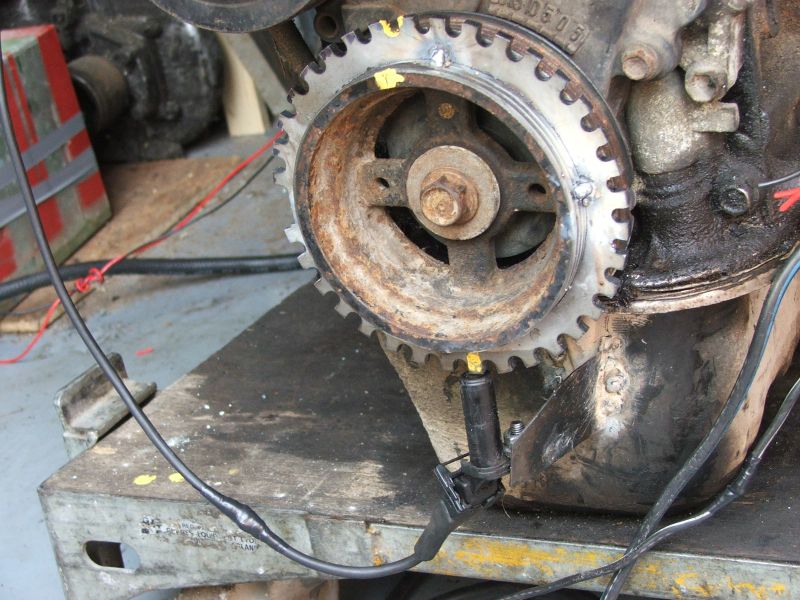
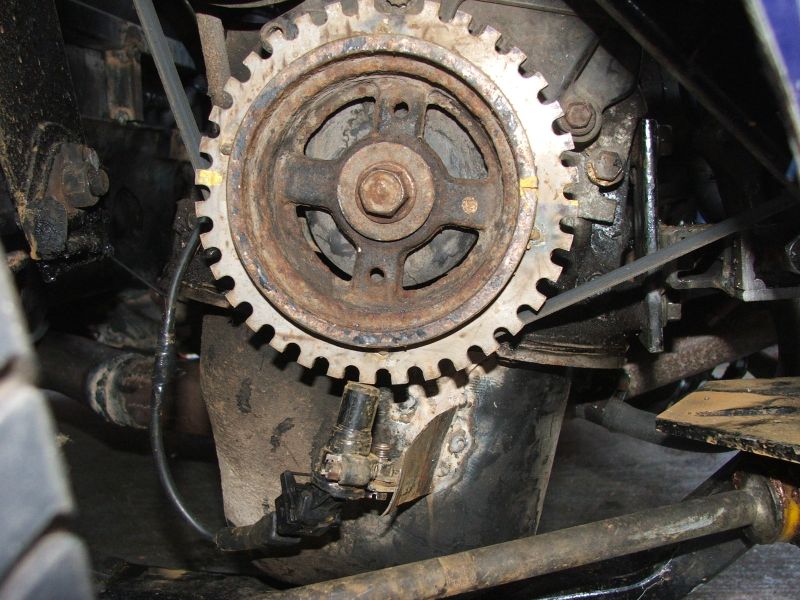
In the afternoon, welded the trigger wheel onto the pulley and welded up a bracket for the sensor.
18th June
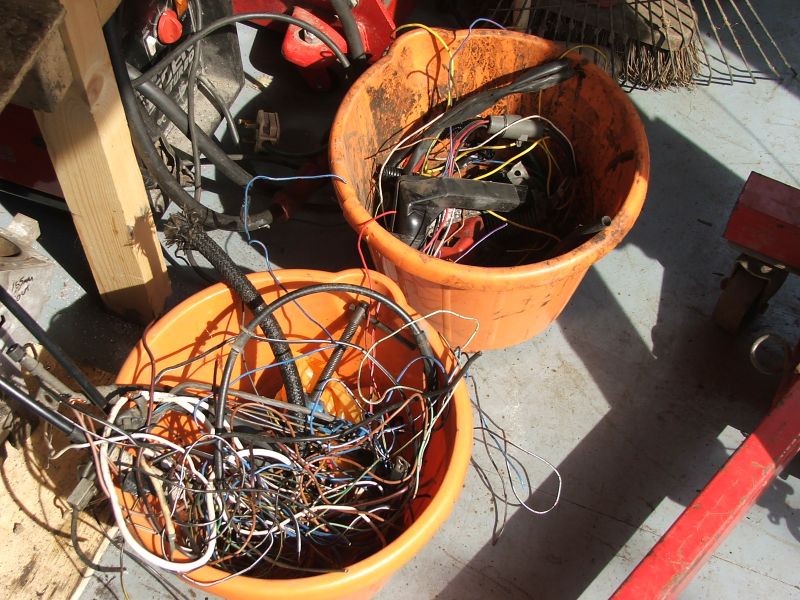
Loom time, stuffed the coil pack in a handy space above the gearbox and started making up the engine loom....
By knitting the cables around various things in the shed.
Leaving a few offcuts !
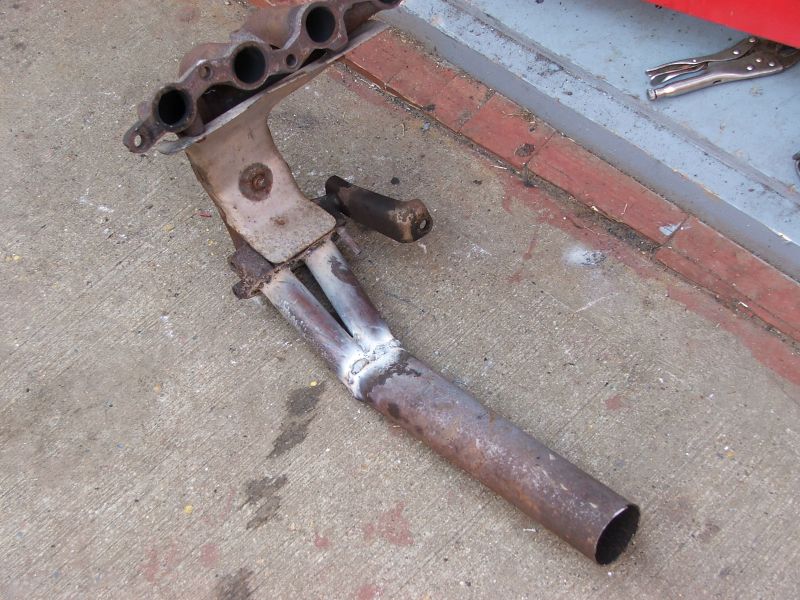
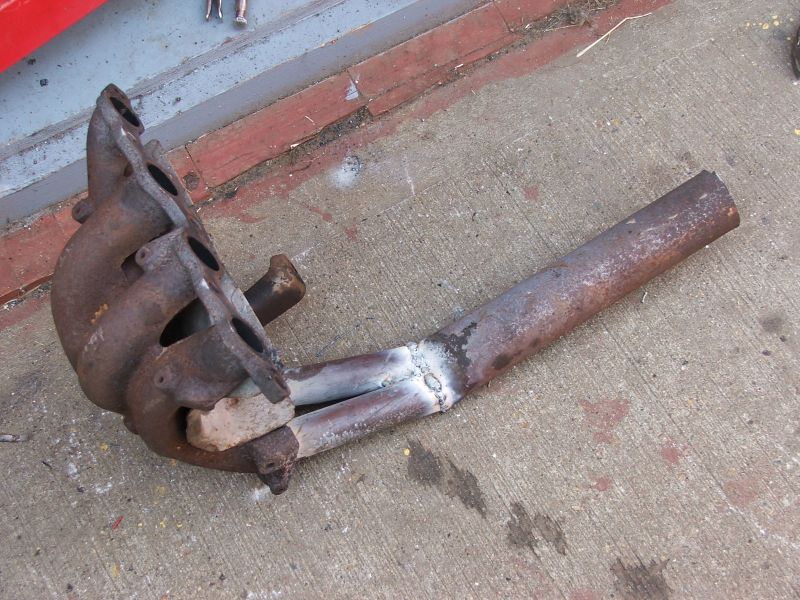
Then invented a '20 minute' manifold recipe.
Take a stock cast manifold, chop a couple of bits of steel pipe and weld on, squishing the ends to fit the next bit o pipe.
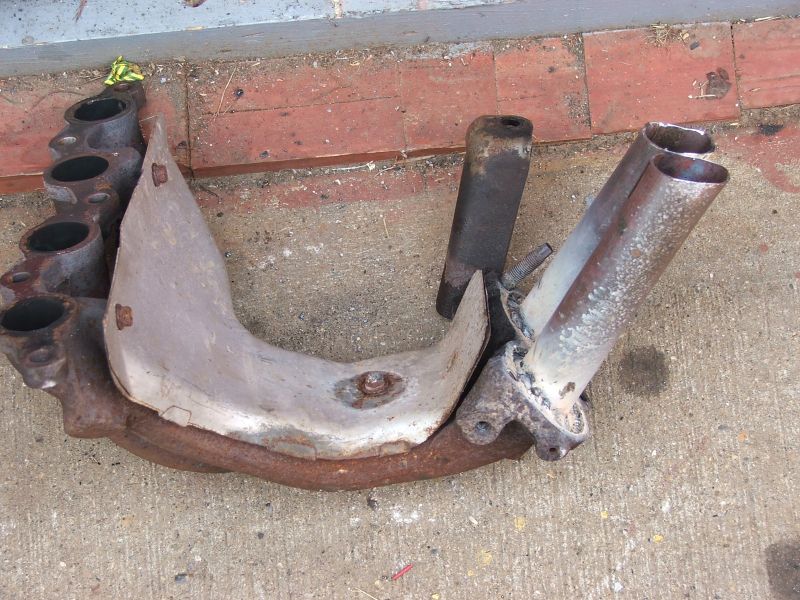
Attach the next bit o pipe and leave to cool for 10 mins :-)
Well, obviously with the 'lectronics in place and a bit of zorst, it would only take a bit of fuel and the engine should fire up, right ?

Engine Test #012.5mb avi (DivX5)
24th June
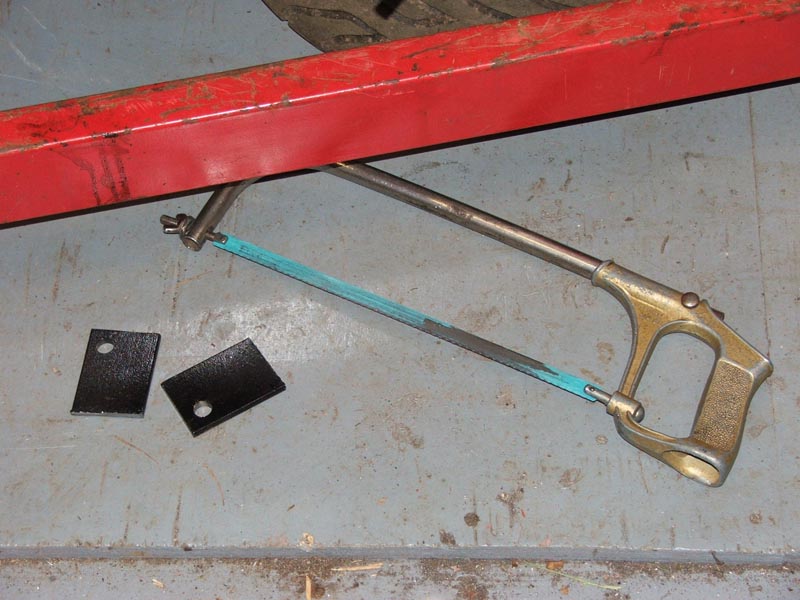
Made quick bodge blanking plate for the distributor out of some 8mm thick aluminium.

With the help of Neil, we pulled out the 1380 removed the Mini subframe and stripped off the suspension components.
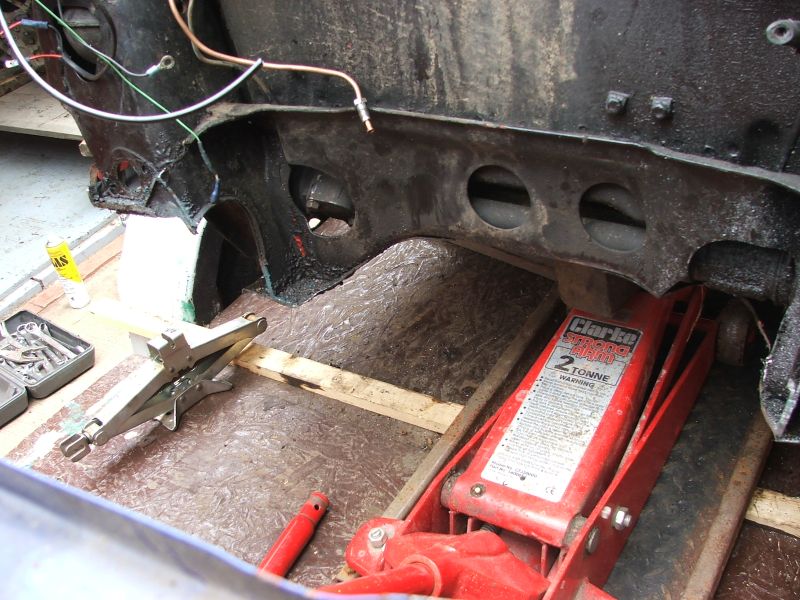
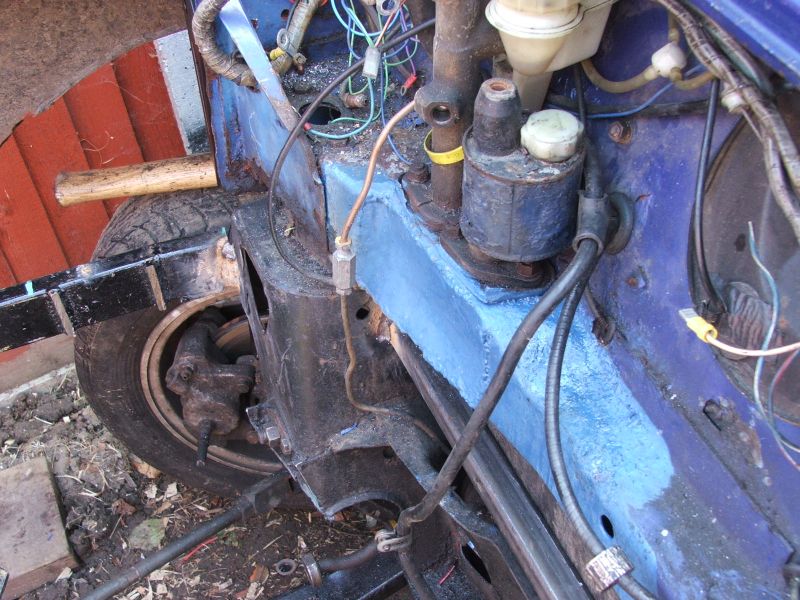
Chopped the front panel and inner wings, then trial fitted the new subframe.
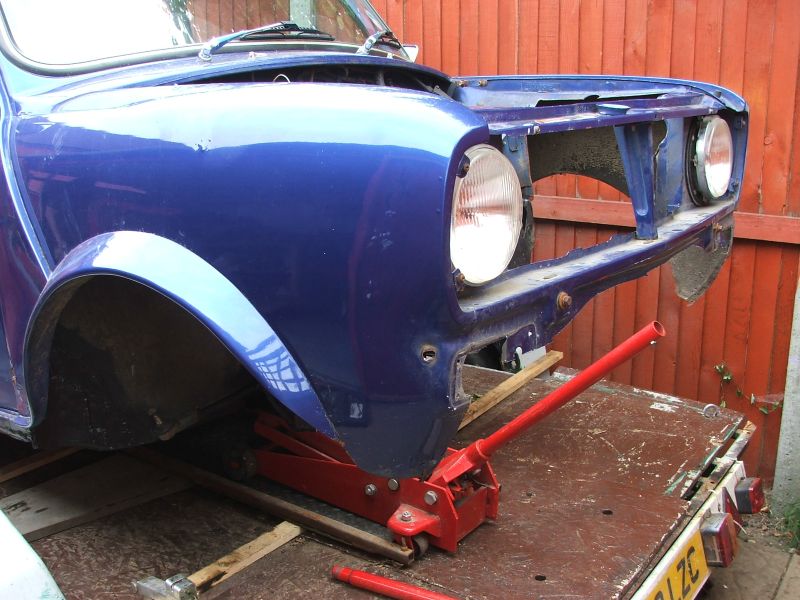
Found that some of the suspension pick up point's were not quite right, so decided that the easiest (quickest) way to fix it would be to glue the back of the standard Mini subframe to the front of the new one.
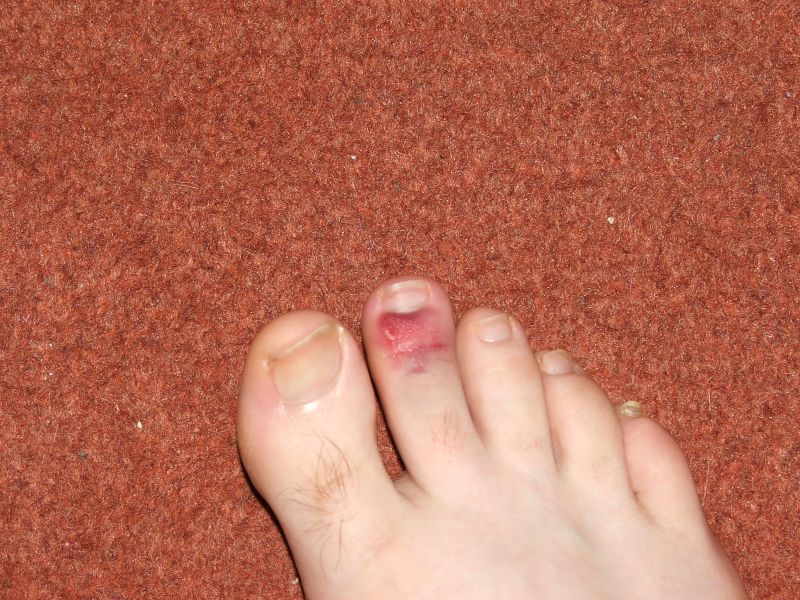
Also... Dropped a trolley jack on my foot :-( Luckily it wasn't the big jack !!
25th June
Spent a couple of hours on the spare head... Exhaust valves cleaned, lapped in and refitted. Then for good measure stuck the zorst cam in and lobbed the cover on. Zzzzz boring job, will leave the inlet for another day ;-)
Mr Neil popped over again to assist and generally offer sarcastic comments about my craftsmanship...
Chopped up the Mini frame and fitted the remains back on the car.
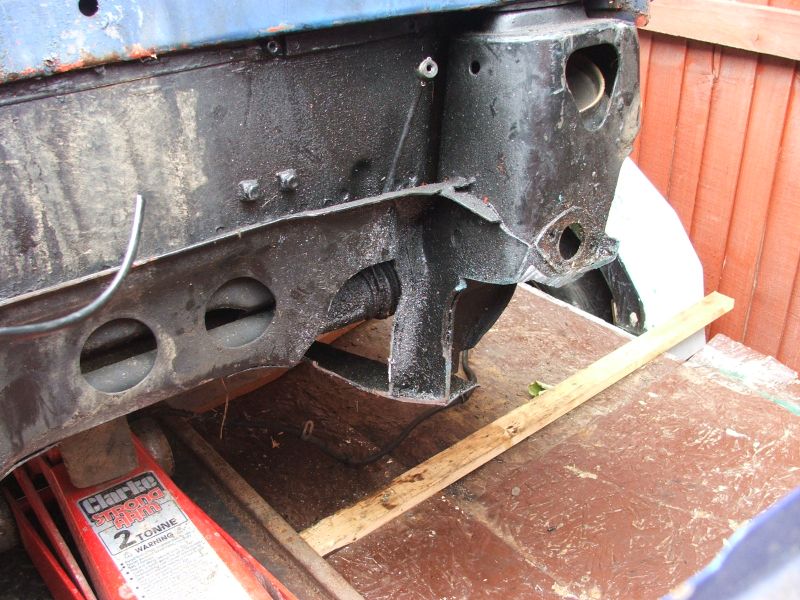
Then chopped the new frame and welded them together to make some sort of b45tard hybrid offspring.

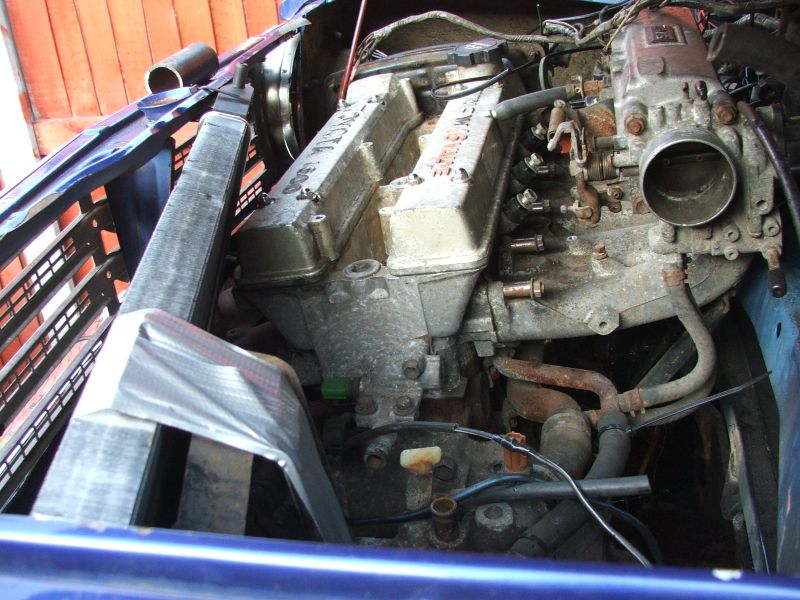
Dangled the engine into the hole and kept trimming around the edges until it fitted in.
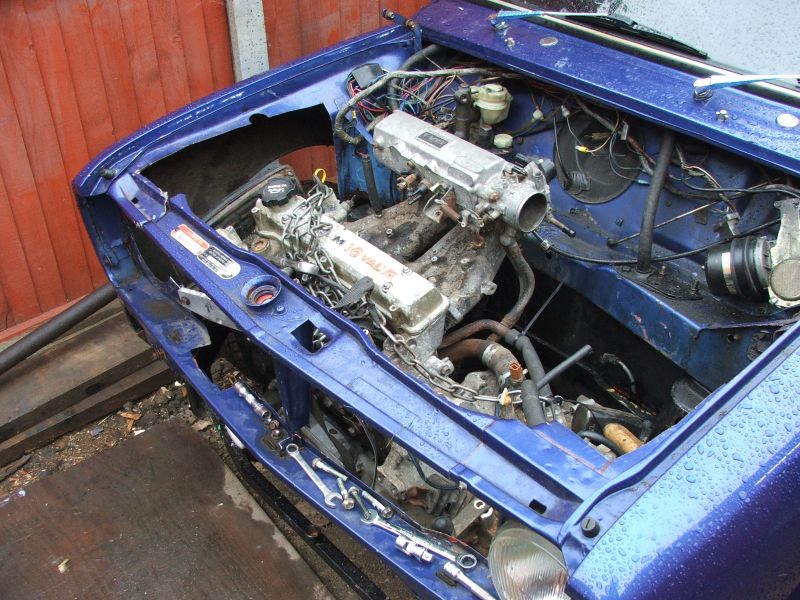
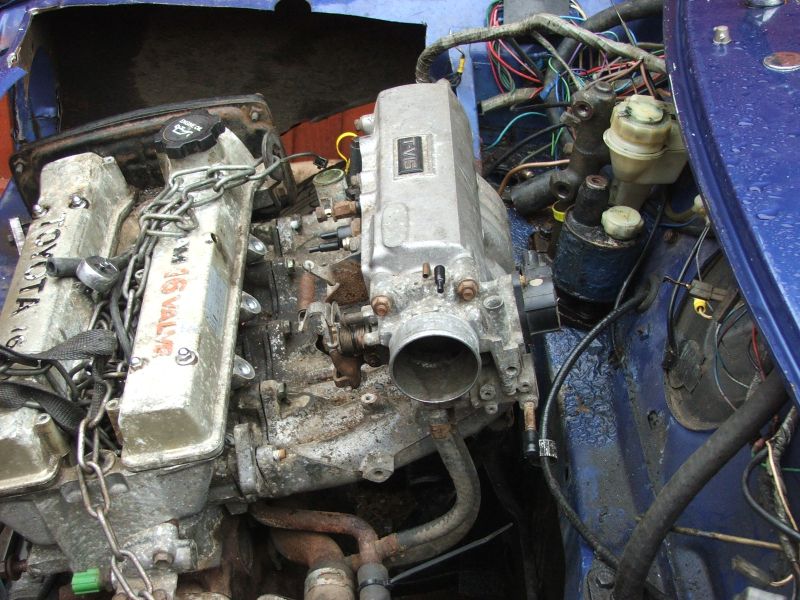
All looking good, but the inlet manifold is fouling slightly on the bulkhead by the master cylinders, so this will need attention to make a bit more room.
26th June
Tried to get adjuster rides to turn & separate from the rubber breasts, all seized up, so coilovers it is then ;-)
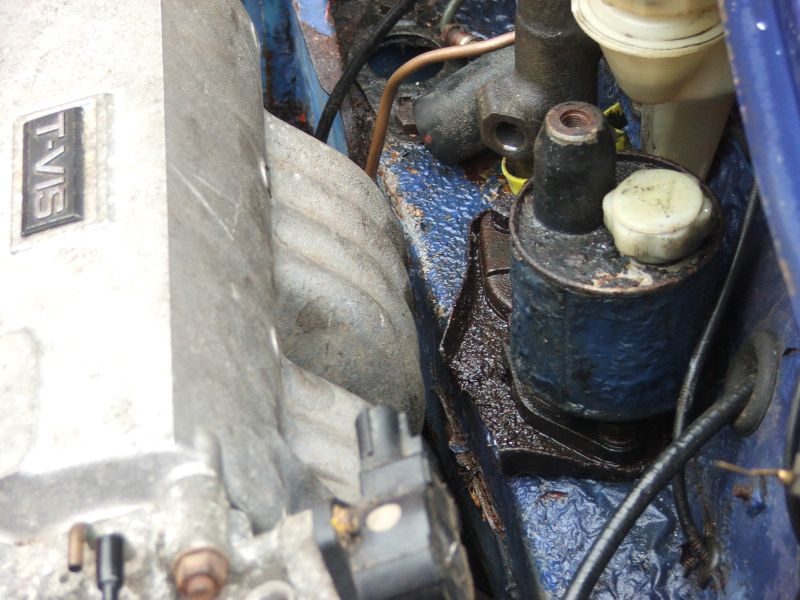
Had a brain wave... If I take out the TVIS butterfly plate, then the inlet manifold suddenly gets 20mm shorter, which should help with the clearance and it's one thing less to have to control ;-) I don't think the Mini is heavy enough to have too much of a problem with loosing a little bottom end torque or economy !
Out with the TVIS,
More room!
Pulled the engine back out, trimmed bulkhead x-member and master cylinder drip catcher and welded in a recess for the inlet.

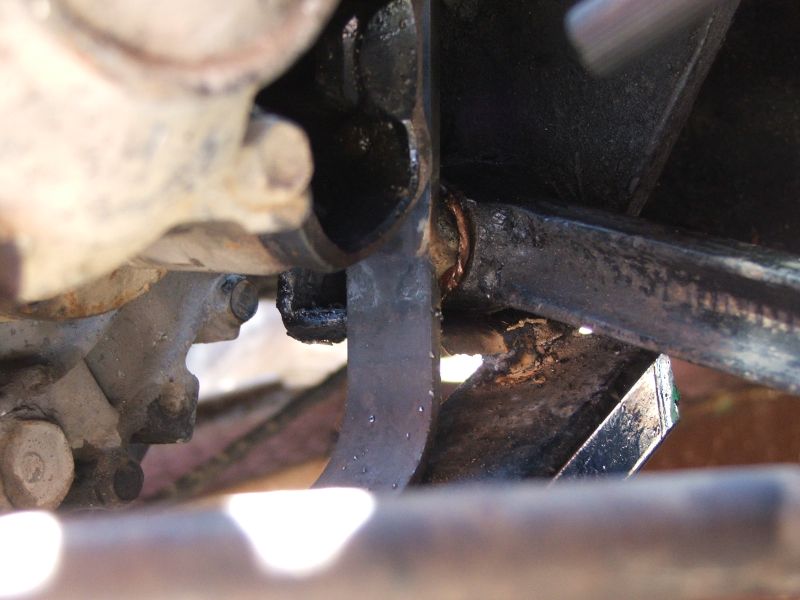
Also trimmed bits of subframe to clear the diff.
27th June
Rebuilt the inlet valves/cams on the spare head, so that's all done and ready now.
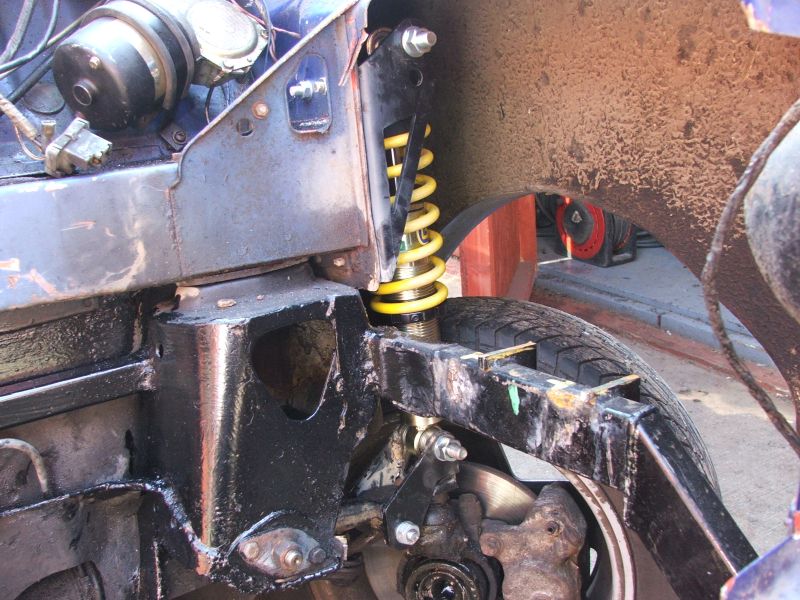
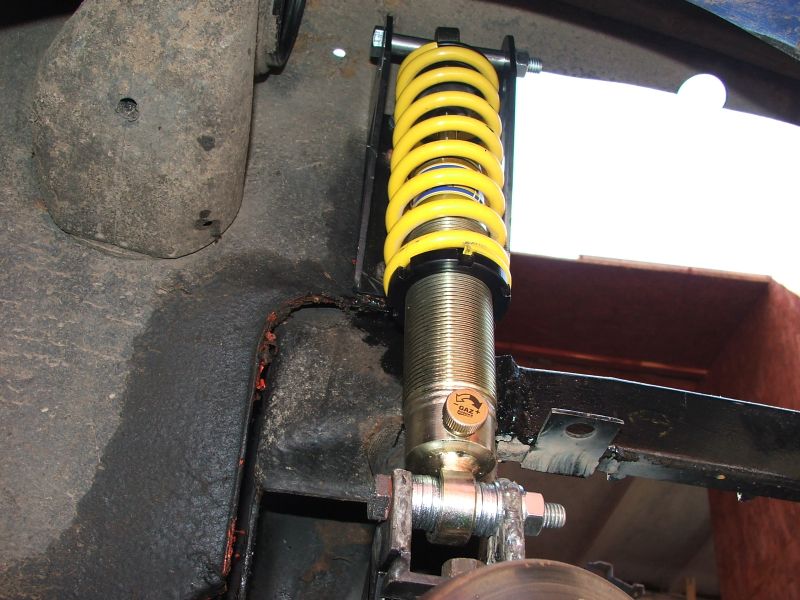
Went a bit MIG crazy and seam welded a load of joins & cut edges on the subframe, then spent a couple of hours tweaking the coilover brackets and assembling them with some nice GAZ rod ended shocks. Handily I had a spare pair of 250lbs springs from Pievan testing, which should be about right.
Dropped the engine back in and roughly located it with some top quality 'bit-o-wood' mountings. Much better clearance to the bulkhead and scope to mount it higher to improve ground clearance.
28th June
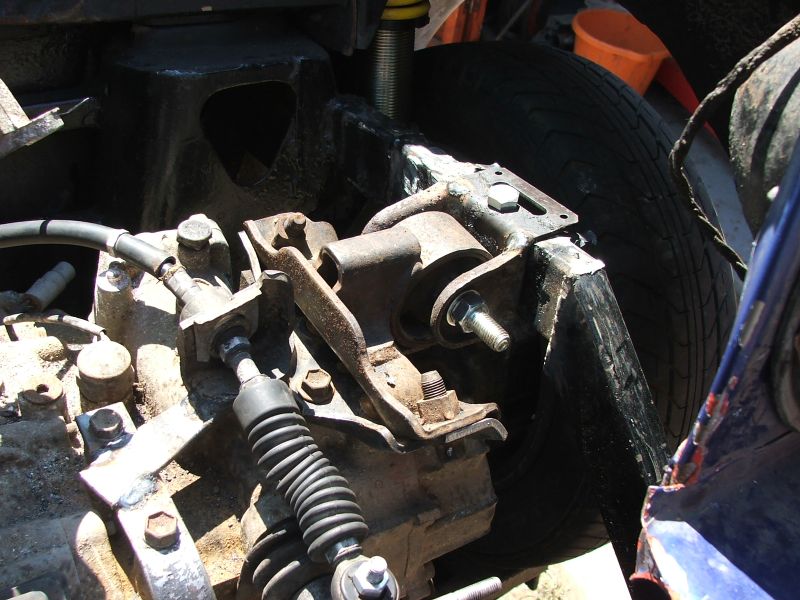
Spent most of the day making the final engine mountings - a time consuming job, but probably quite important to get it about right!
Engine needs to be centred so the front wheels don't foul the crank pulley or gearbox, needs to be nice and straight across the car, needs to be mostly horizontal and there needs to be the minimal gap between the back of the engine and bulkhead (less than 10mm). Oh, and lastly the mounts need to be easy to reach, easy to use and must take up as little engine bay as possible.
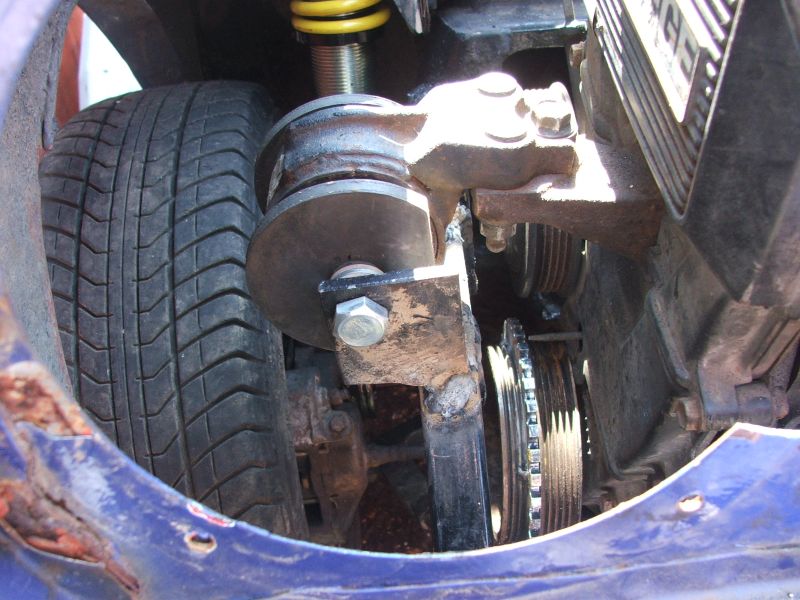

Results are good, the engine is nice and solid with as much space as possible left for the radiator and other junk :-)
Chopped the front off the bottom arm pins, fitted new bushes and welded some locating strips hold the front ends in place. Suspension is now finished and just needs the angles checking.
29th June
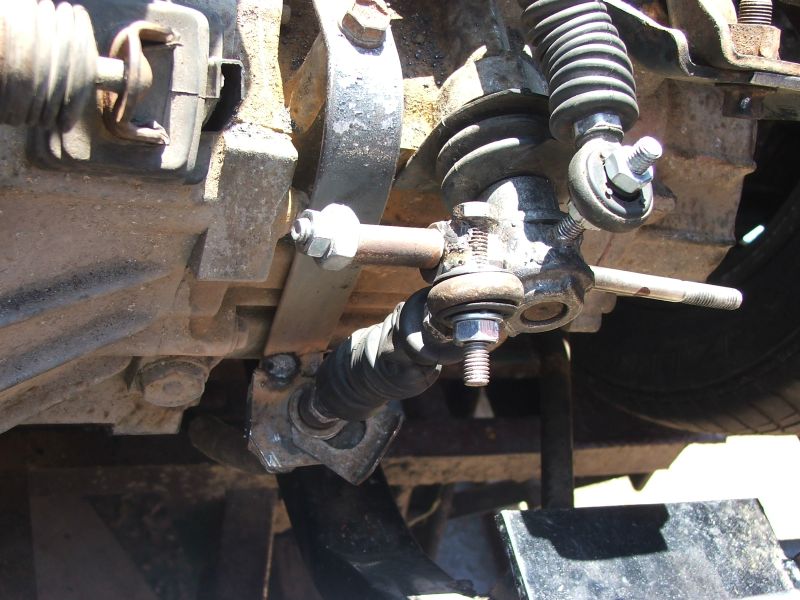
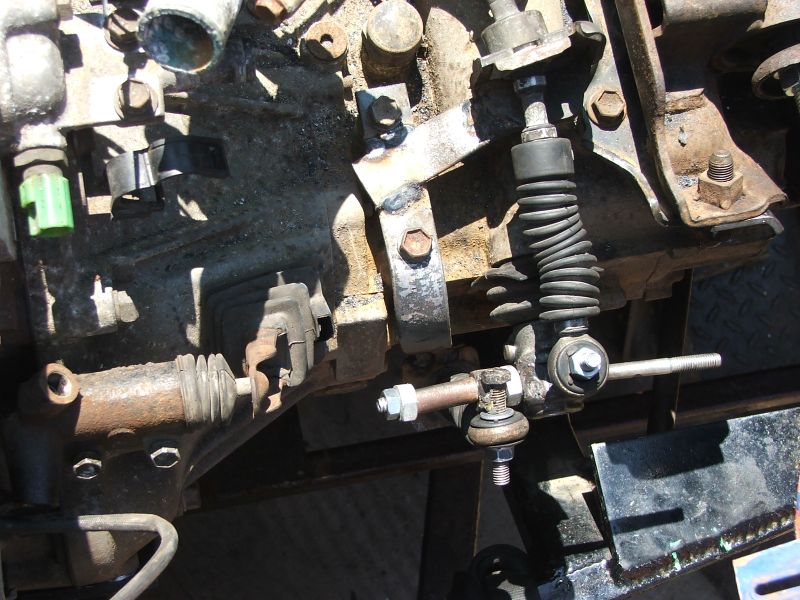
Another time consuming job, this time the gear linkage. This one needed a bit of thought to ensure that the gear stick ended up working the right way after reversing it. Other things to consider:- fixed cable length, routing of the cables, location of shifter, leverage ratios - and a small, simple design (right, no pressure then!!).
After much head scratching this is revision #1. The cables run tight to the box to save space, and are connected to give the smallest shifter movement possible, which should result in reasonable travel when the stick gets lengthened. (The extra spiky bits will be lopped off when it's all been tested properly!
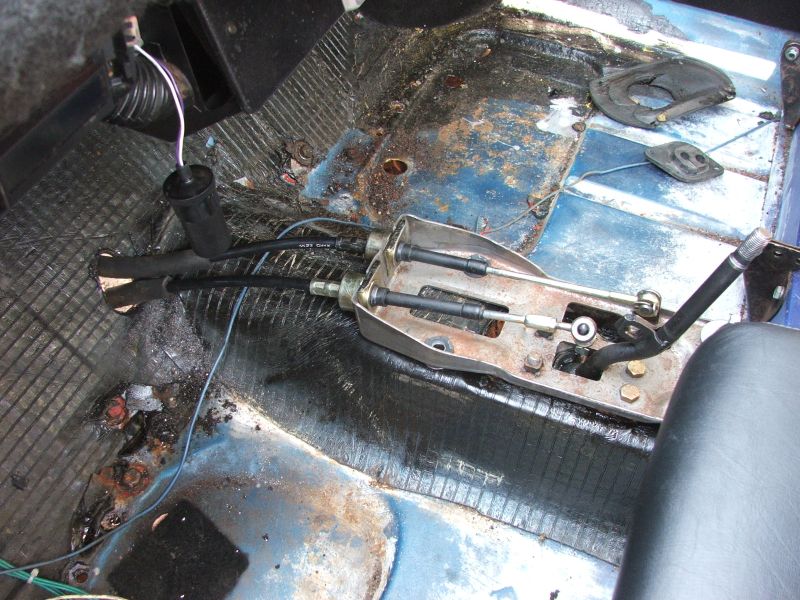
The MR2 shifter thingy fits nicely to the floor unlike the huge comedy beige plastic lump you get with the Vauxhalls ;-) The stick will need to be extended for a comfortable reach.
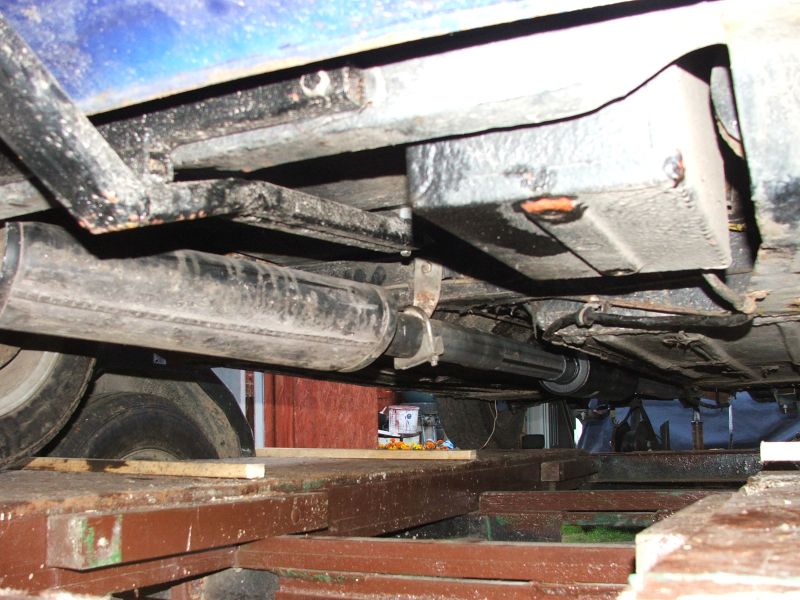
Then onto making the final exhaust - 2" bore with 2 boxes, hopefully should have reasonably deep note, but not be too loud and chavtastic ;-)
Extra wiggle welded onto the fanny-mould to get the pipe in the centre of the tunnel.
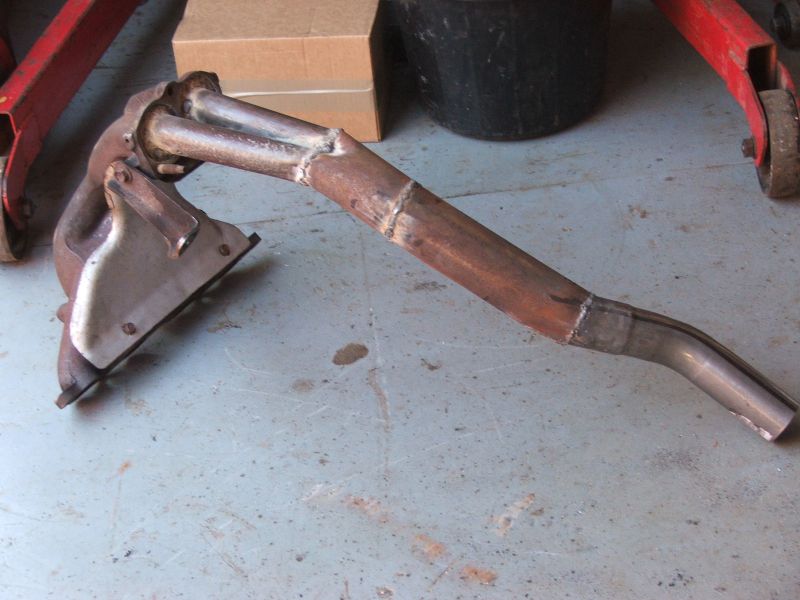
Jetex rear silencer with the old RC40 tail pipe welded on.
Jetex intermediate box.
30th June
Chopped up the removed bits of front panel then welded the corners back in place on the car, the middle bit behind the number plate comes off with the bumper for easy access .
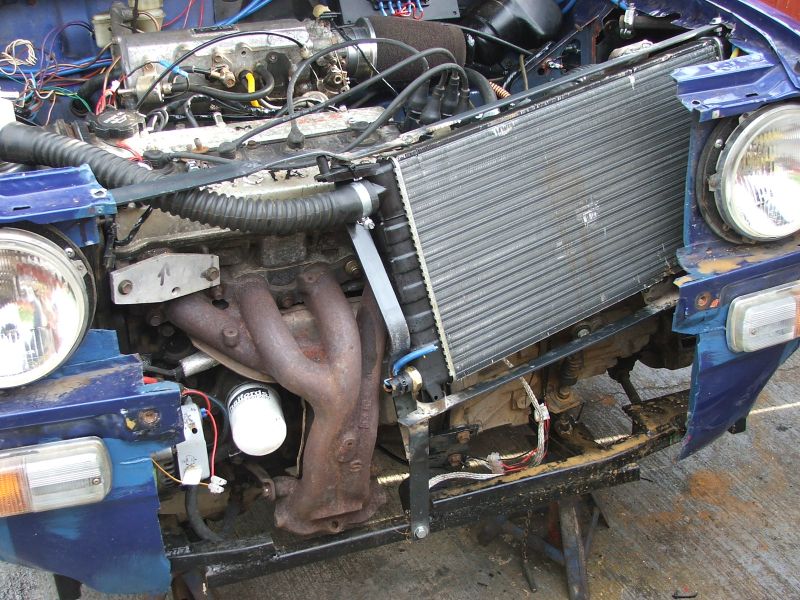
Trial fit of the Corsa radiator looks reasonable, although it took a fair bit of juggling and fettling to get it to squeeze in with the fan !
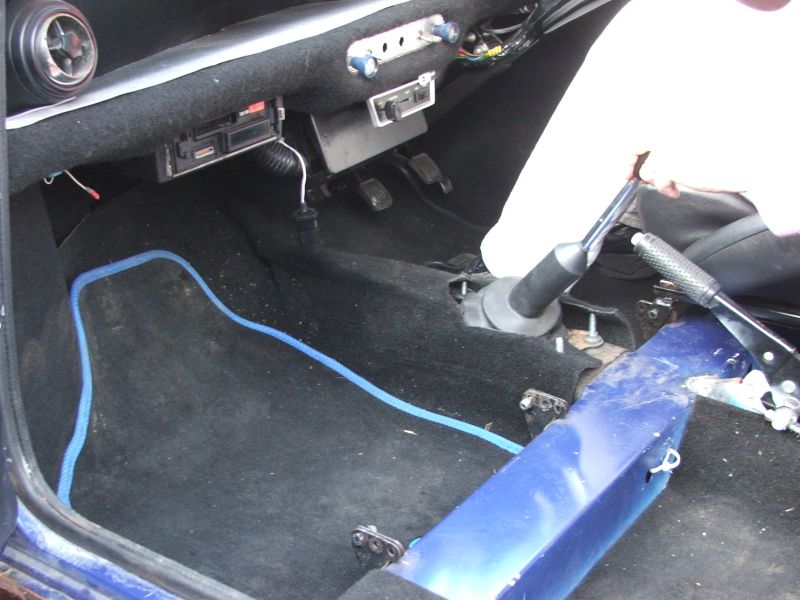
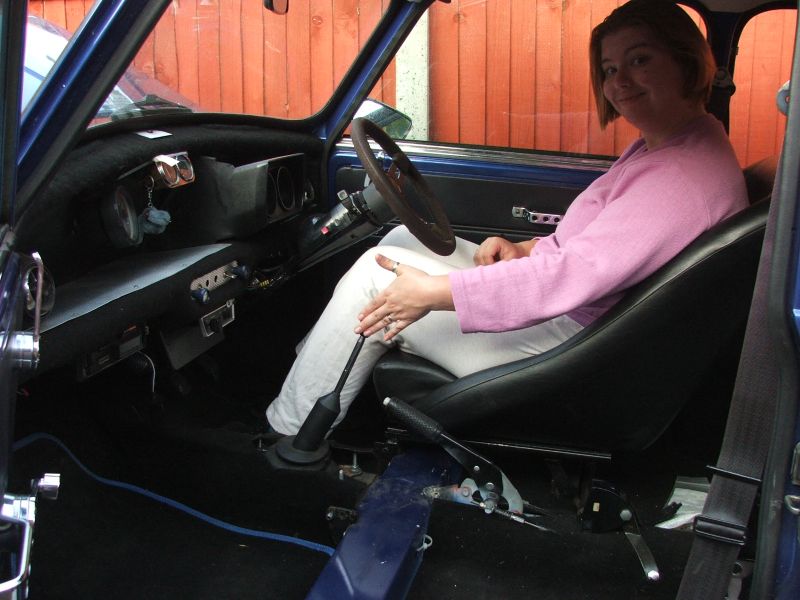
Extended the gear stick, modified the Mini gaiter to fit, then lobbed the carpet back in. - Also got Elaine to be an ergonome and er, test the ergonomics :-)
Removed the inlet manifold, drilled an 18mm hole in Y piece, then welded a 1/2 nut in place to make a boss for the O2 sensor.
1st July
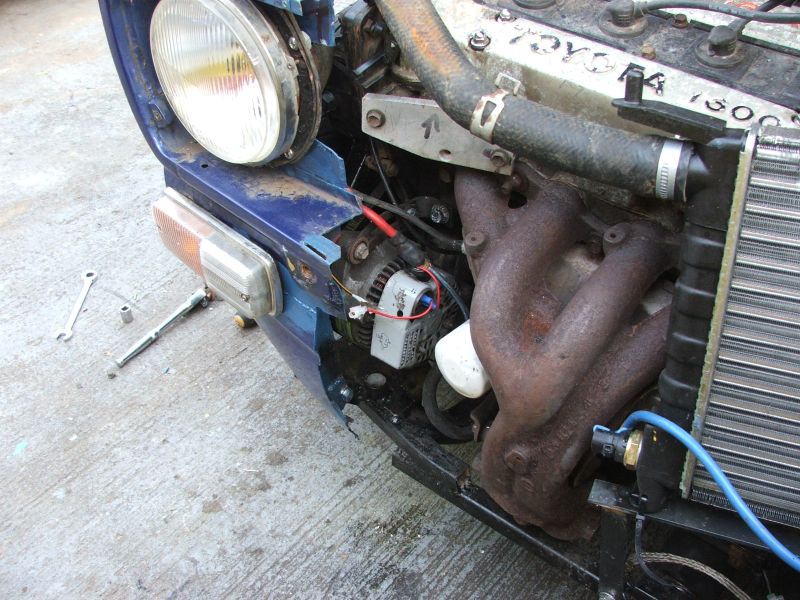
Spent the morning creating a bracket for the alternator, to squeeze it in under the headlamp, then measured the belt and tootled off to Halfwits. Found the nearest belt size was 10mm longer so redesigned the bracket - poop !
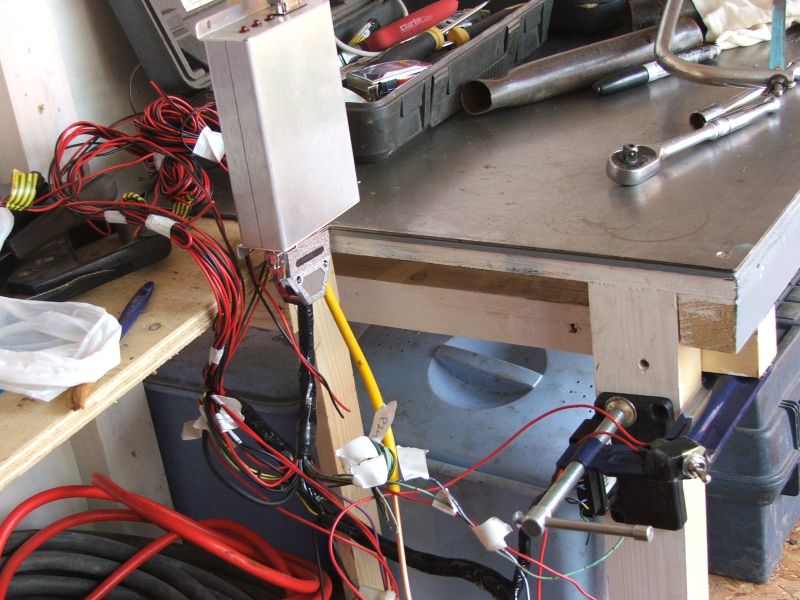
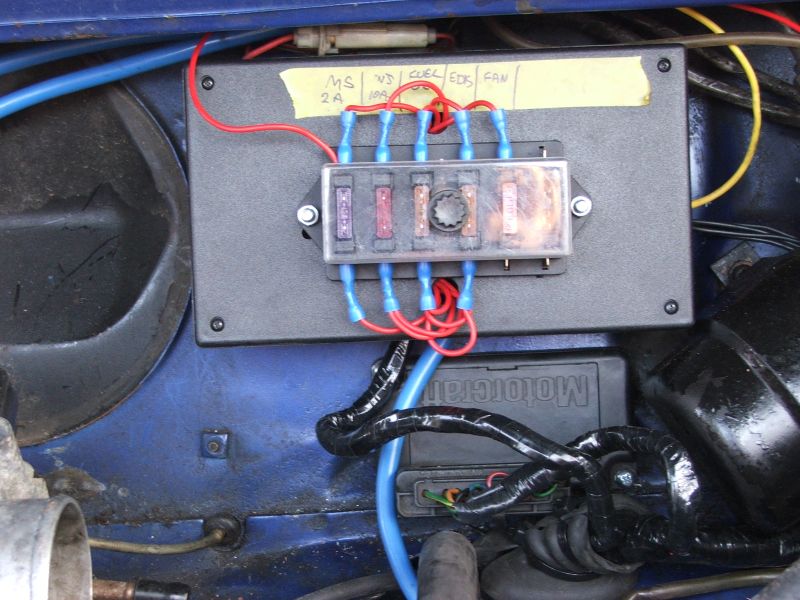
Fitted the sooper-Spag relay / fuse box to the bulkhead, and mounted the EDIS module underneath, then installed then engine loom, which, due to a slight change of plan needed a bit of editing.
Here's a shot of the EDIS VR sensor and 36-1 trigger wheel - this time not a LEGO install ;-)
2nd July
Sunday, so had a lie in and didn't venture outside until 0630 :-)
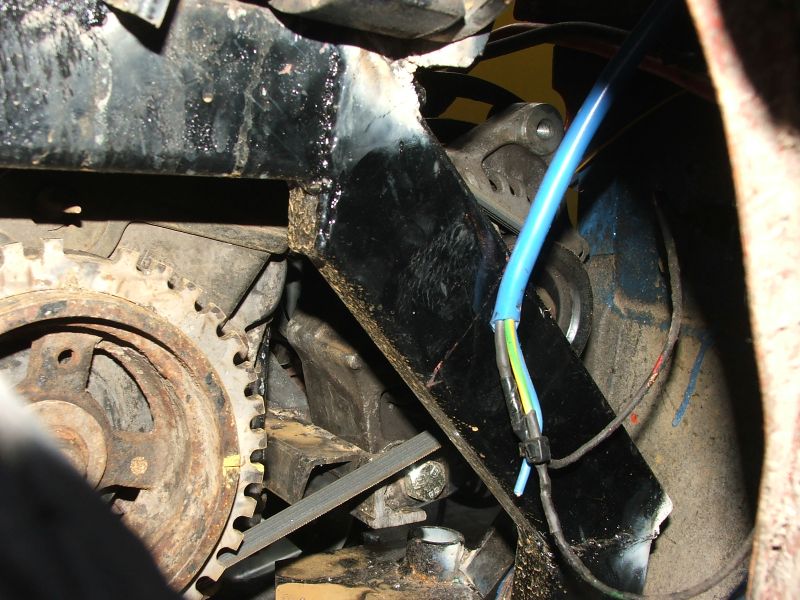
Spent a couple of hours playing with wiring and other 'lectrical stuff, then Neil came over and got horribly frustrated in the blazing sun, trying to wire the front lights back up. He had a damned good excuse though - some of the 1975 BL wiring had changed colour due to age & oil contamination, turning blues into greens !!!
I also had a fun job trying to diagnose why we were not getting any sparks until Neil asked if the timing strobe actually worked. Sticking a screwdriver up the plug lead showed that the strobe had died. Poop more wasted time :-(
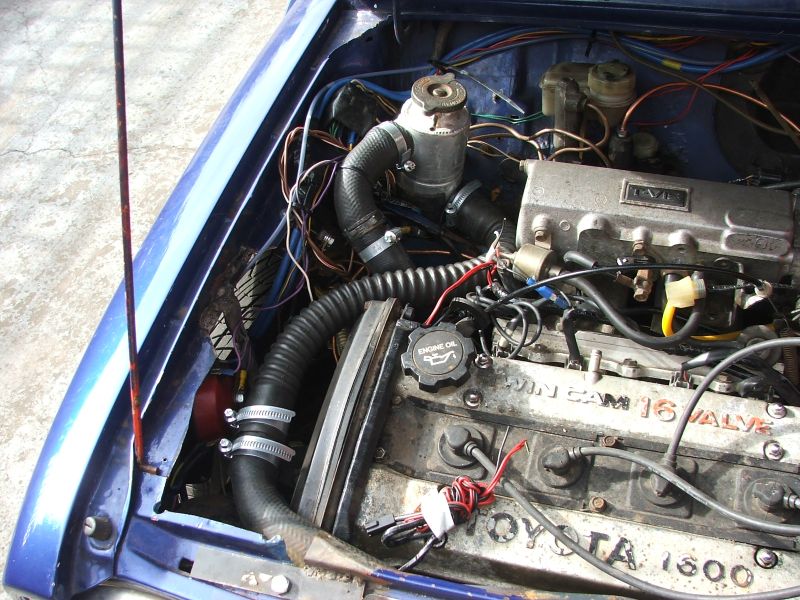
But after these little technical hitches were overcome, we quickly plumbed in the cooling system.
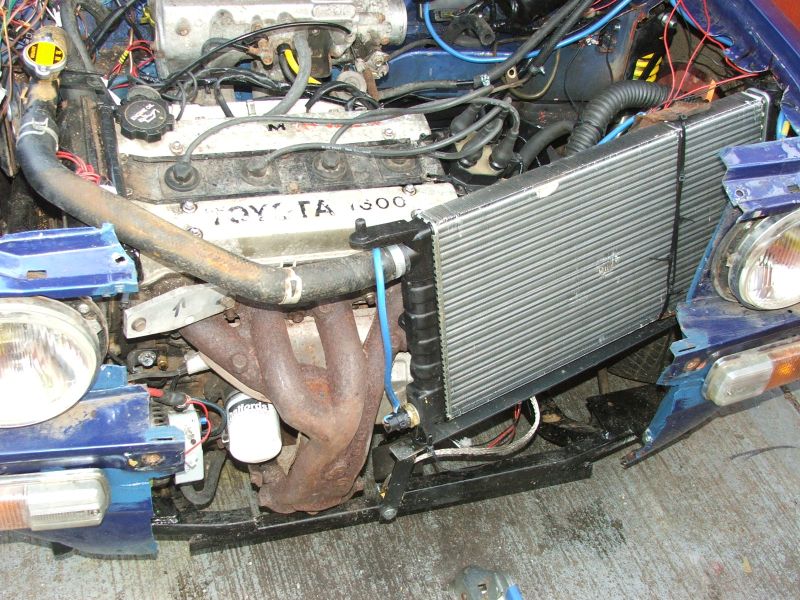
Then added a temporary fuel supply and fired the engine into life :-)
Very pleased, using a mostly default map the engine sounds pretty sweet with 60+psi of oil pressure at 1300rpm, then after a bit of fiddling got a nice stable 600rpm idle too !
05_run2.avi - 7670kb DivX avi of engine running in car.
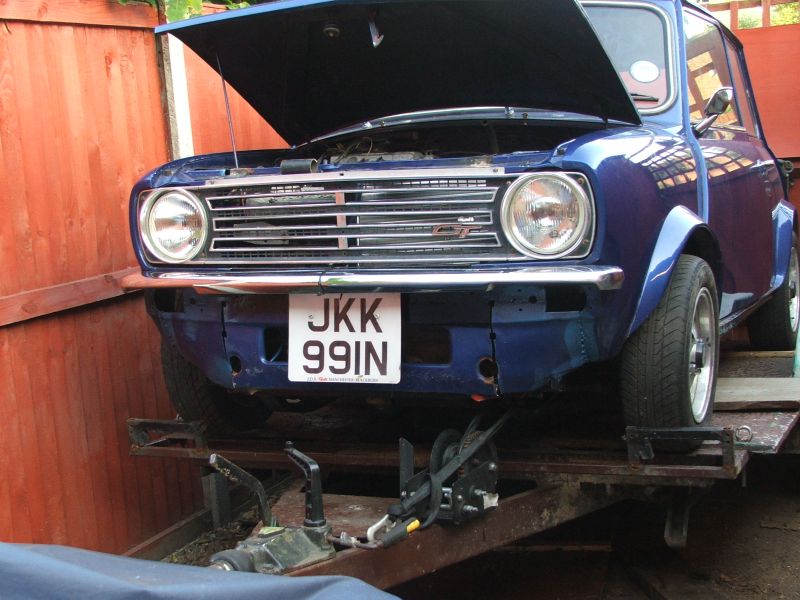
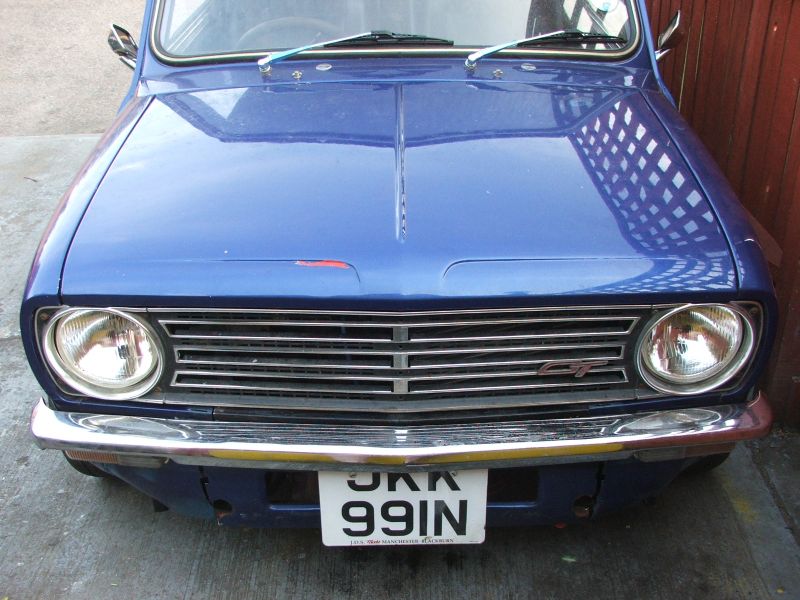
Then unwound in the cool of the evening by fiddling about with the removey front panel thing.
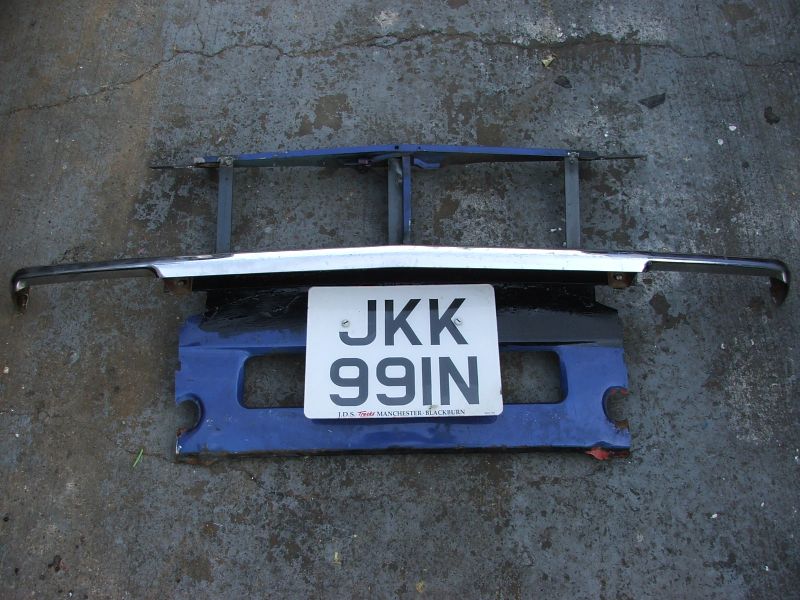
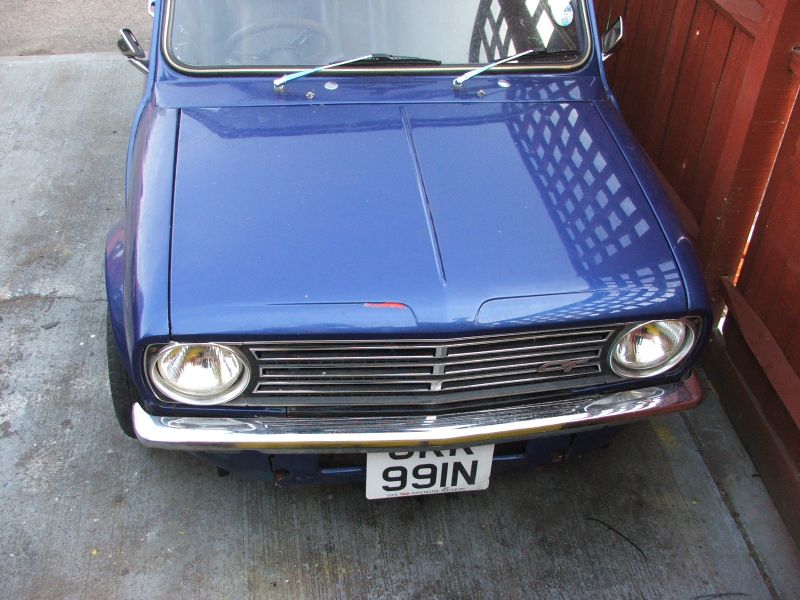
Which fits in the 'ole with 4 bolts.
Then the grill screws in.
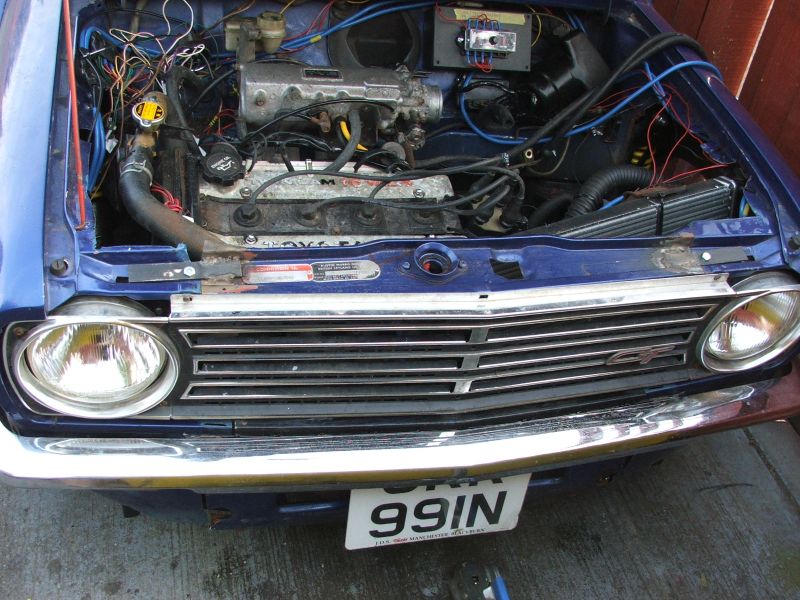
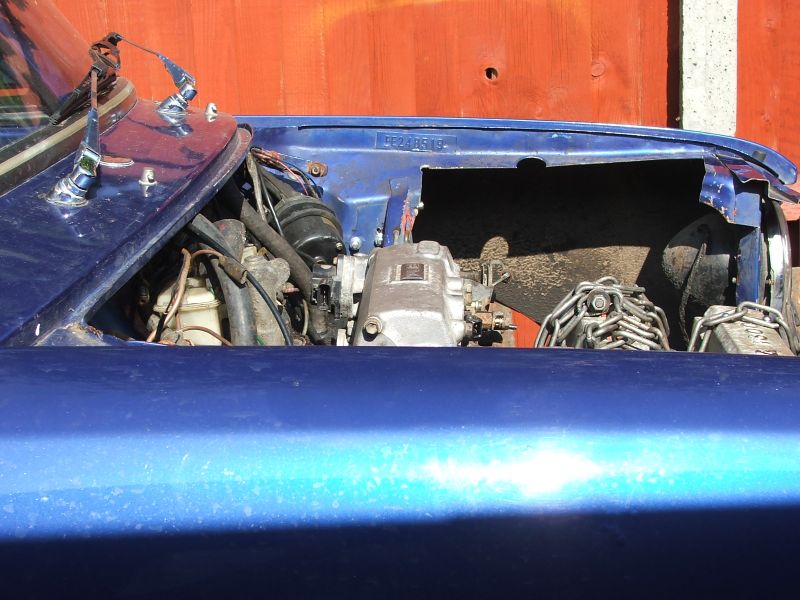
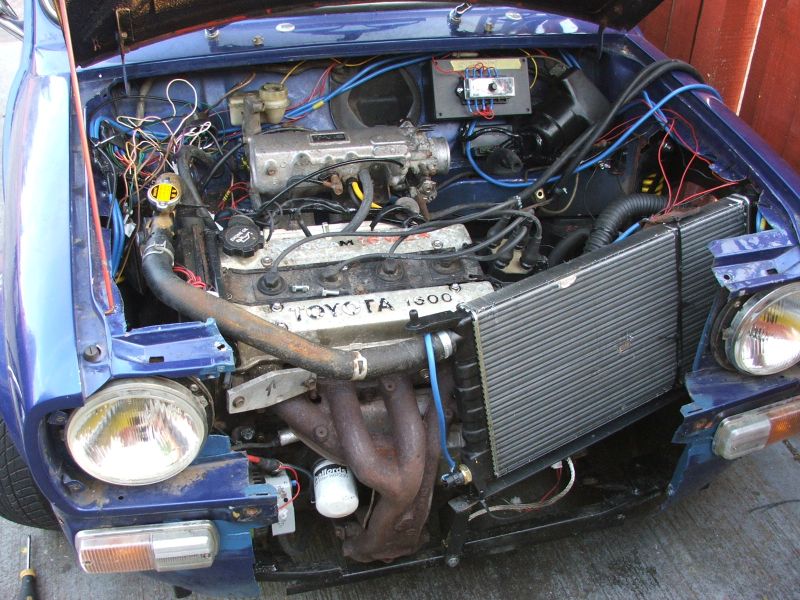
Doesn't compare too badly with my earlier fake pic ;-)
In all, quite a discrete install !
Still got a few things to do before driving though.... Driveshafts, fuel tank, brakes, and a bit of dash wiring etc...
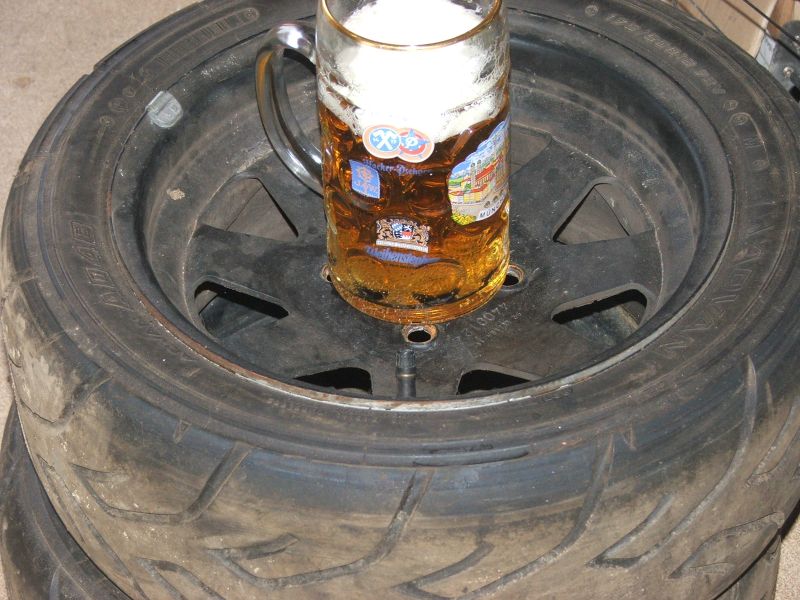
I think I deserved the big celebratory beer !! (Hope Neil had one too!)
5th July
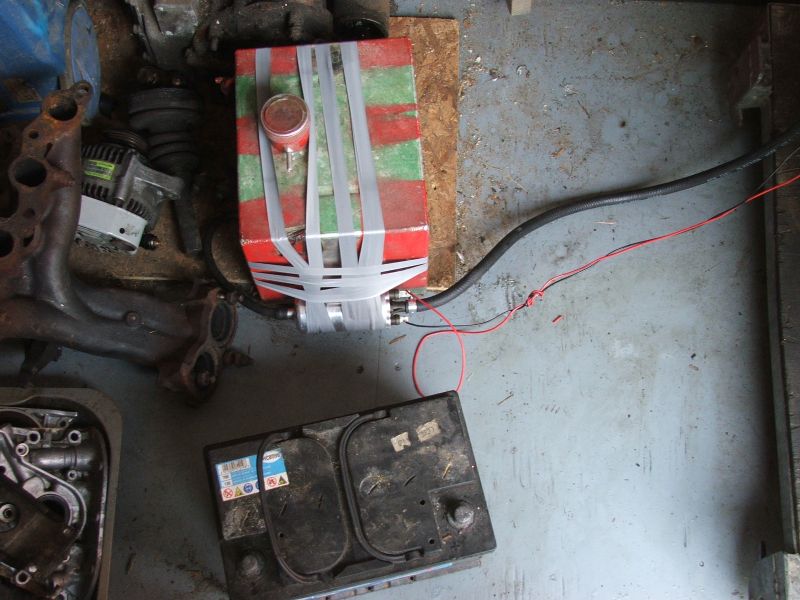
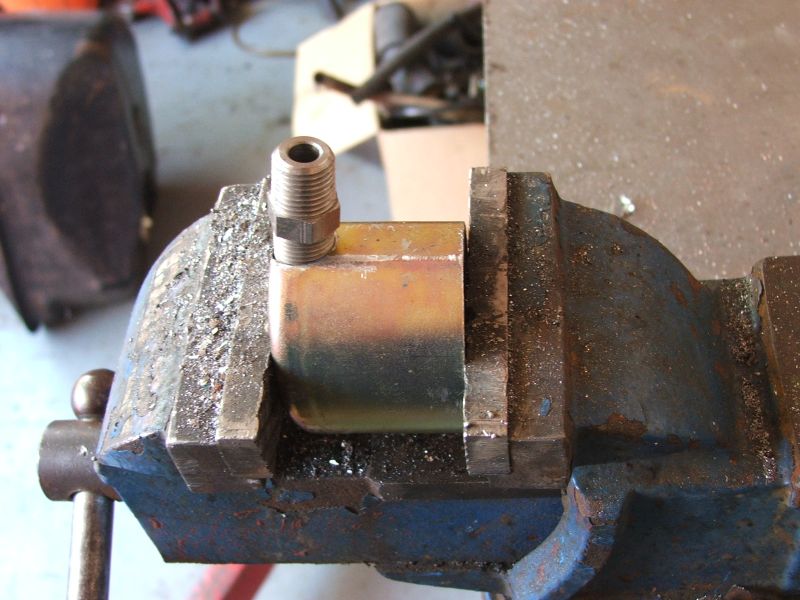
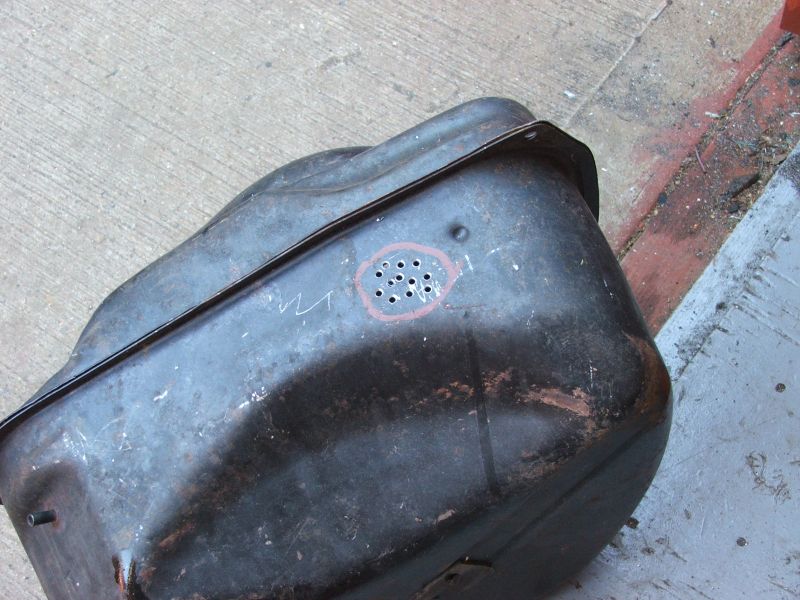
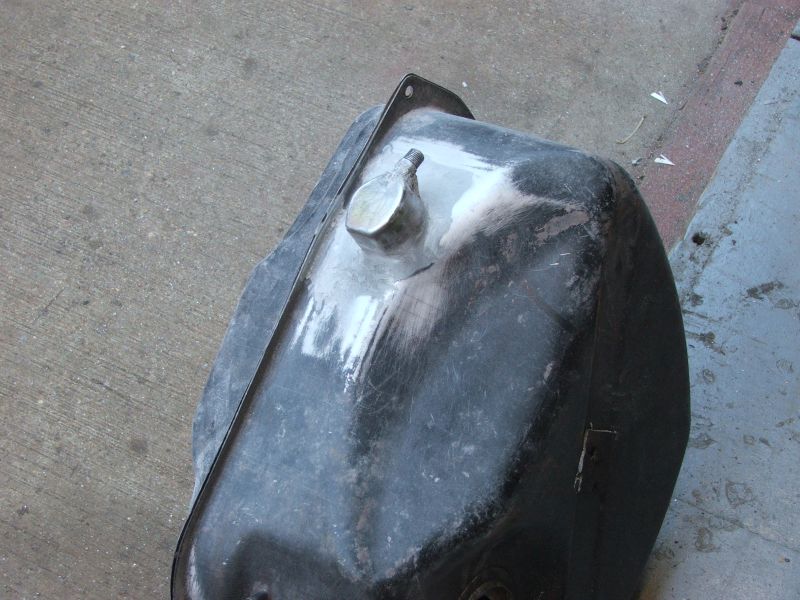
Modified a standard 7.5 gallon Mini tank for fool injection by welding a 'Spag-sump' fuel take off to the bottom...
A suitable steel can with a pipe fitting welded on forms the sump that will collect fuel from the bottom of the tank. It's not very big, but will hopefully stop the pump from sucking air on acceleration or cornering - when the tank is running low...
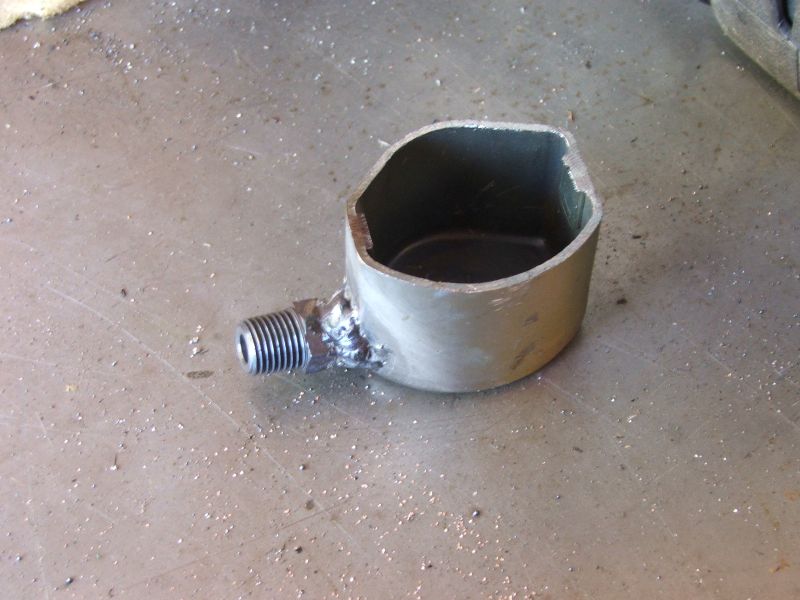
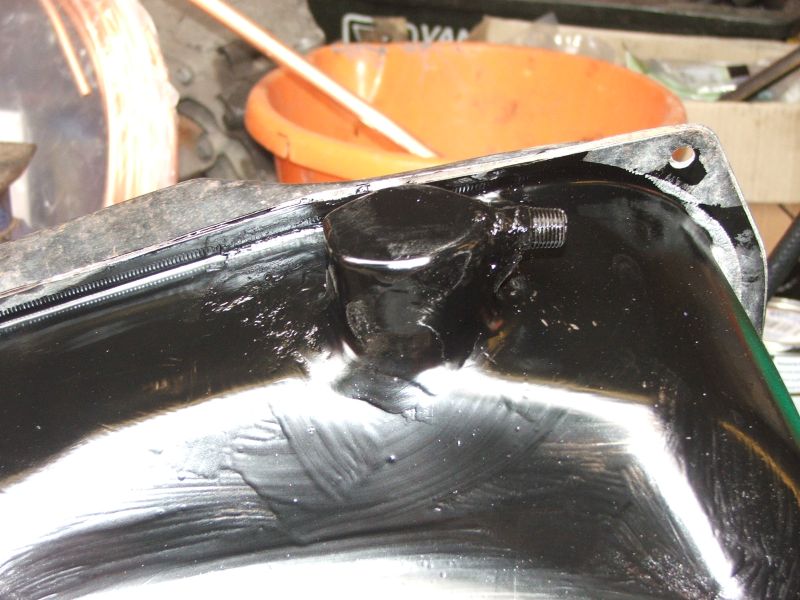
The sump fits on the bottom of the tank and the fuel drops through these holes...
NOTE - welding something that has contained petrol can be a bit risky and potentially fatal, so... don't do it !
This tank has not been used for 7 years and has been left uncapped for that time, bit it still had a petroly smell ! So, to make sure the tank wasn't going to explode while welding I chose the super safe option of remotely applying a match or two.
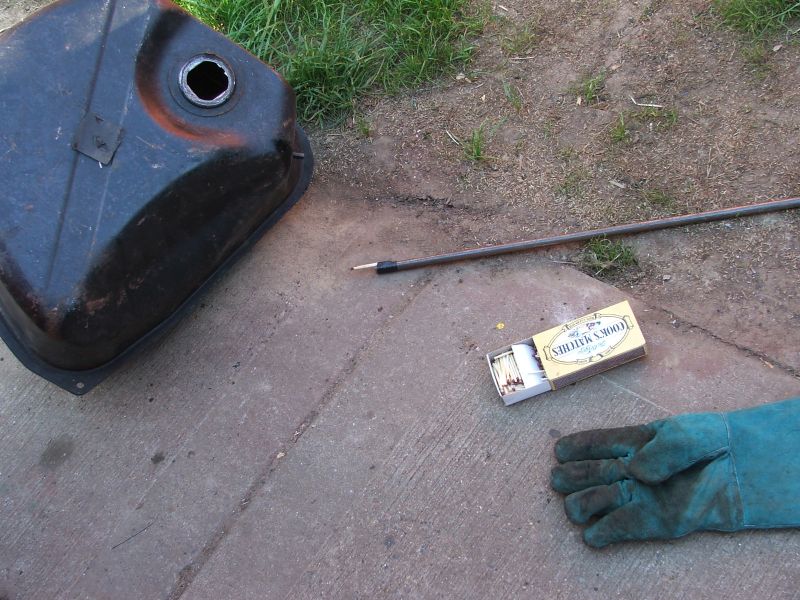
After a distinct lack of detonation or even feeble fire I proceeded to the next stage in preparation of welding.
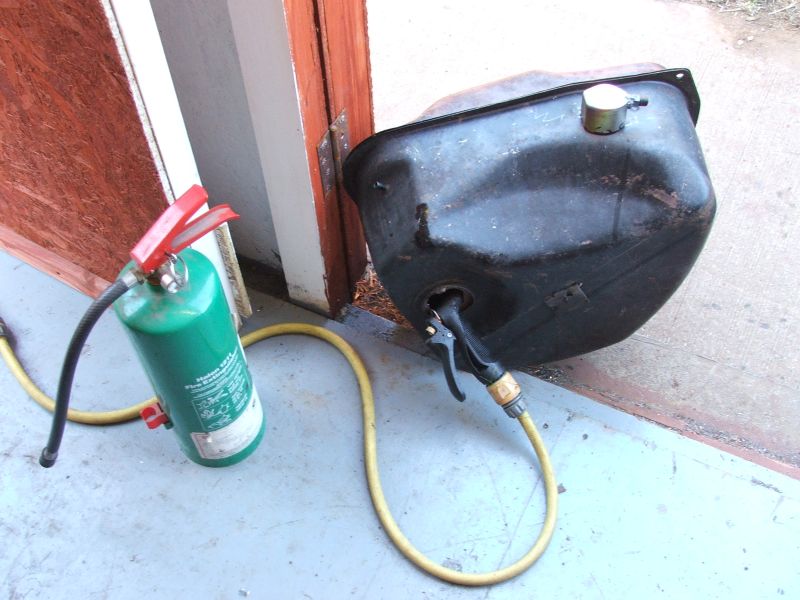
During welding the tank had (recycled) water running through it and an extinguisher on standby.
The Spag-sump welded on with no incidents and to make sure it's leak proof a thin skim of chemical metal was added.
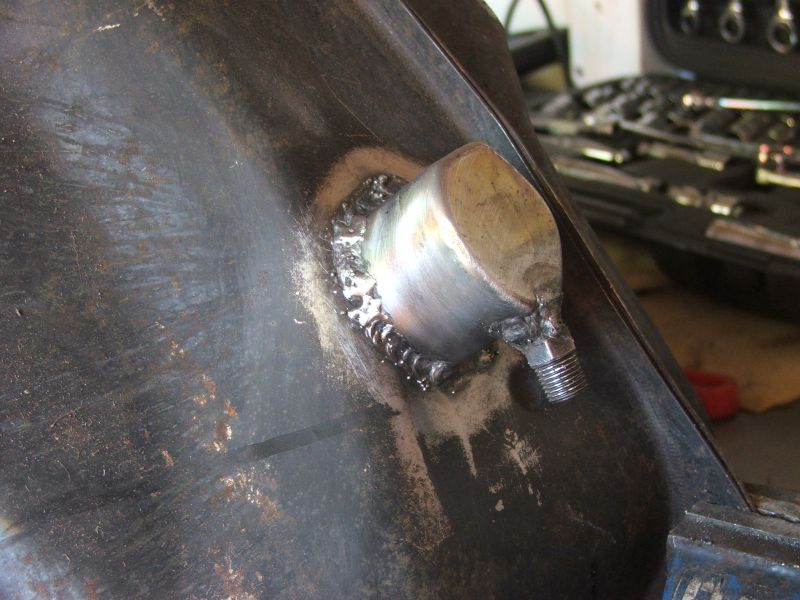
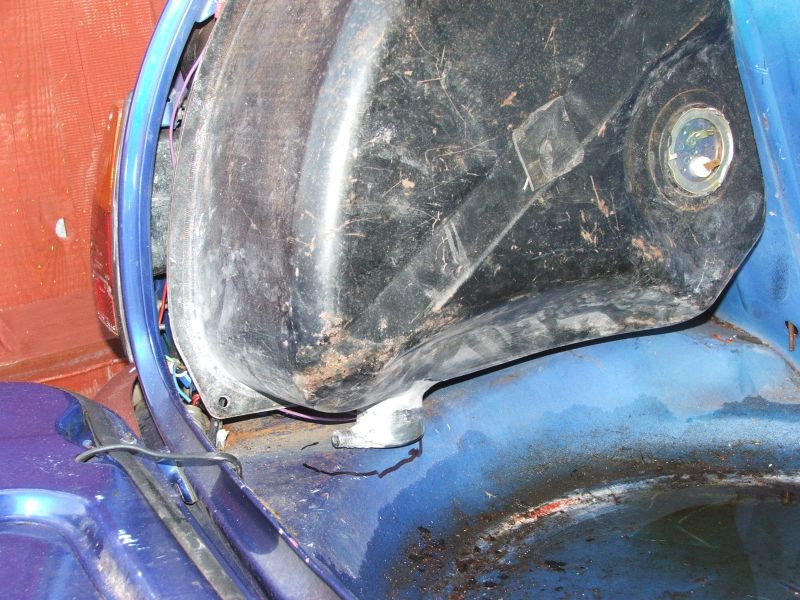
Tank still fits :-)
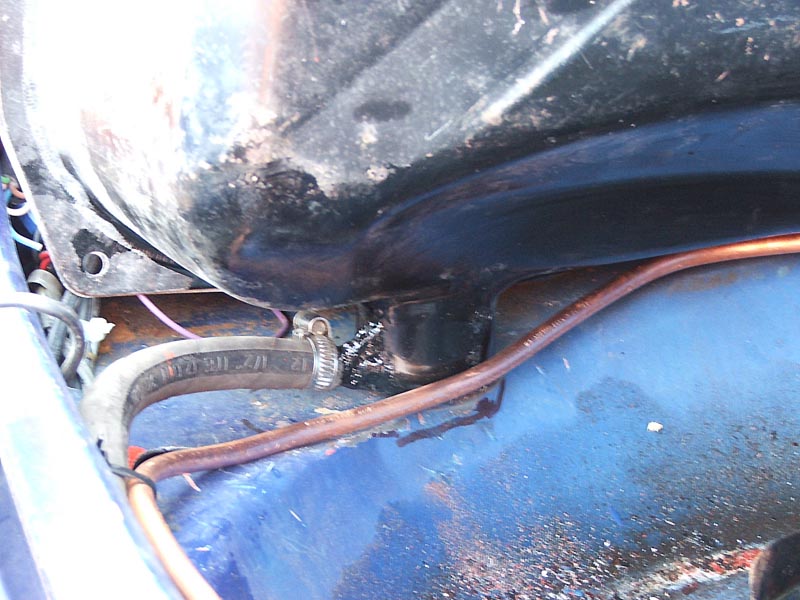
So after a quick lick of Hammerite the fuel system is now working (if not fully bolted in...)
8th/9th July
Mr Neil assists again :-)
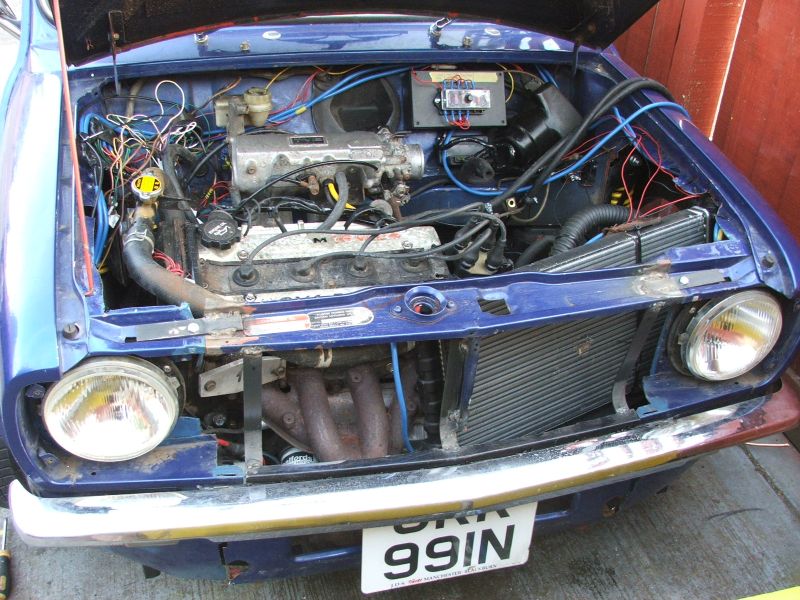
Removed the radiator to make space for the new front brake plumbing and Neil lobbed on the flexi hoses, then he went off to the back of the car to fight with fitting the rear flexies and some smaller bore cylinders.
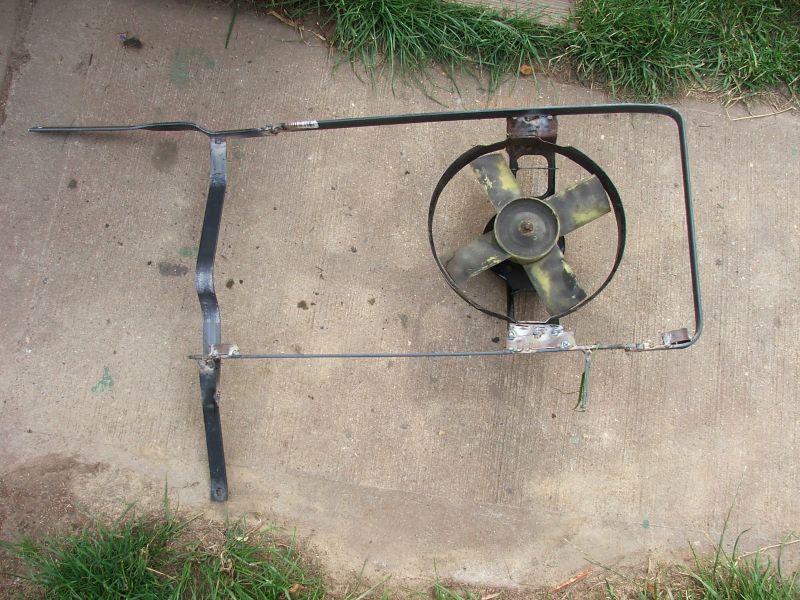
New radiator/fan brackety frame thing for a more solid mounting than cable ties !
A nice collection of copper plumbing fittings, chopped up hoses and cable ties plumbs in the heater and bypass pipes.
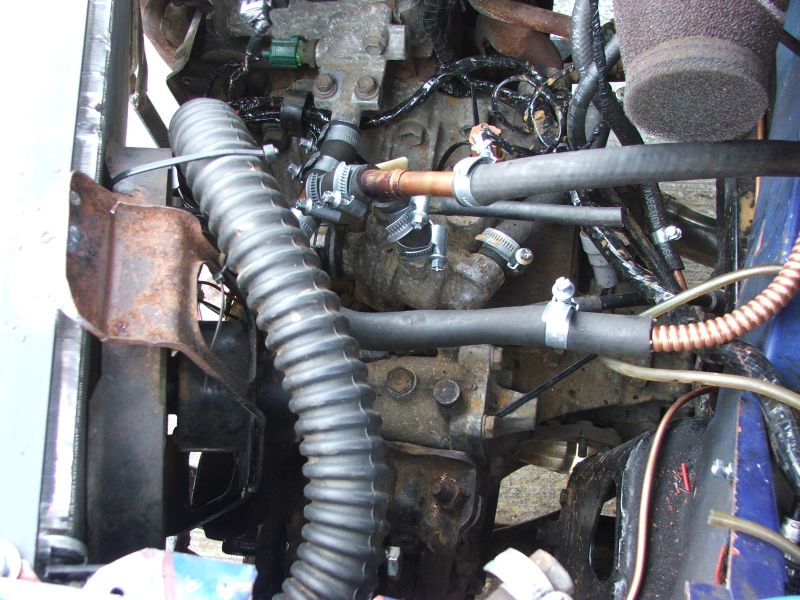
After running the engine up to temperature and flushing the poop out we spotted that the water in the swirl pot was flowing the wrong way :-(
Turns out that the Toyota engine has the stat the other way round... So instead of the stat opening to let hot water out to the radiator, it opens to let the cool water in - bugger!
With a bit more plumbing, it all works the right way round now :-)
Next tasks were 'lectrics and shafts, so Neil sets about cursing the 20years of sundry mods and bodges to the loom, while I get busy with the MIG'n'grinder.
Washers, new indicator switchery, accessory socket & 'orn all working.
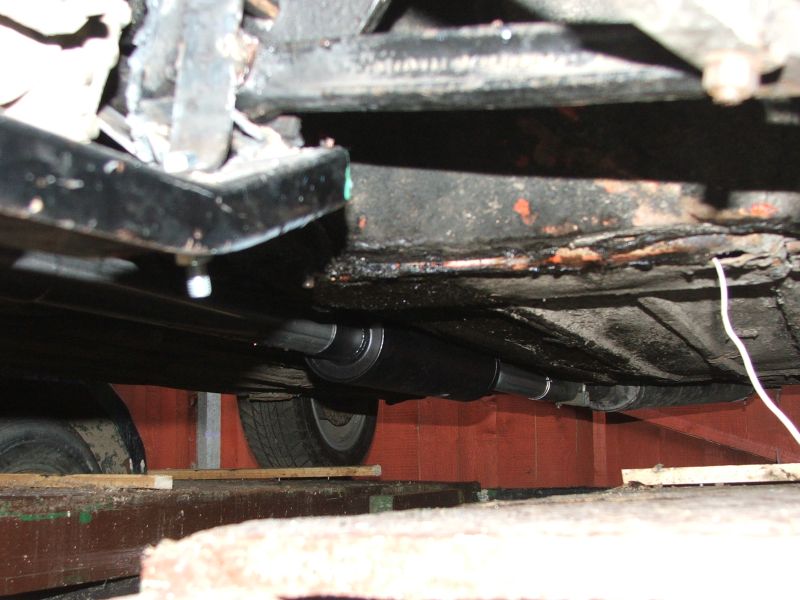
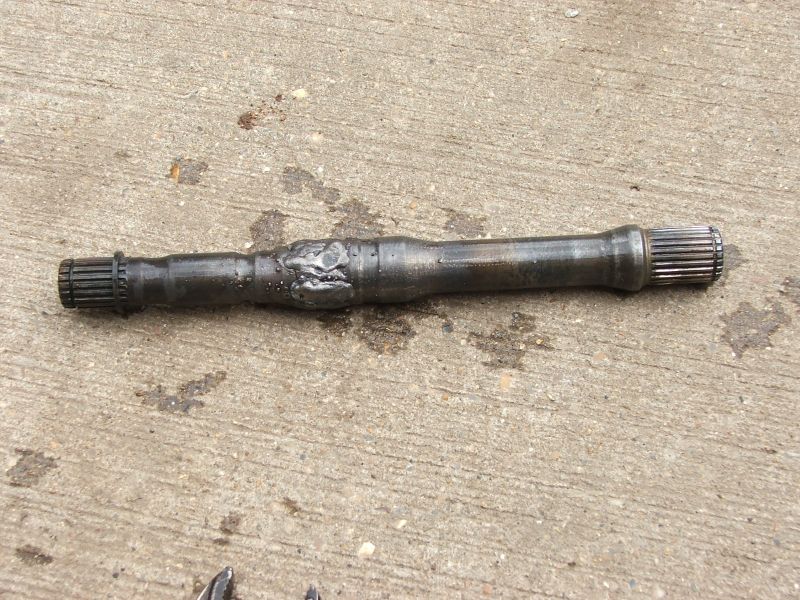
Mini & MR2 drives hafts measured, re measured, measured again then chopped up and welded together again, results were remarkably straight!
The nearside shaft is pretty short, so the CV boots will almost overlap !!
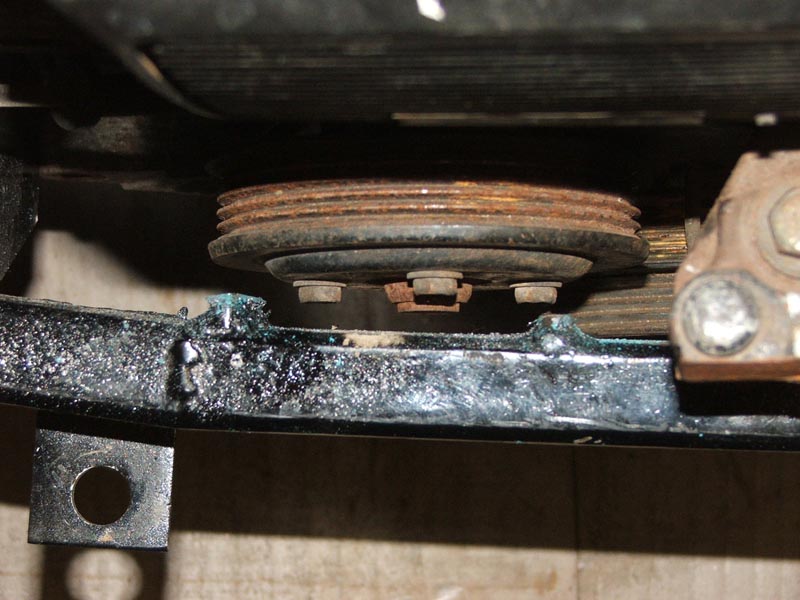
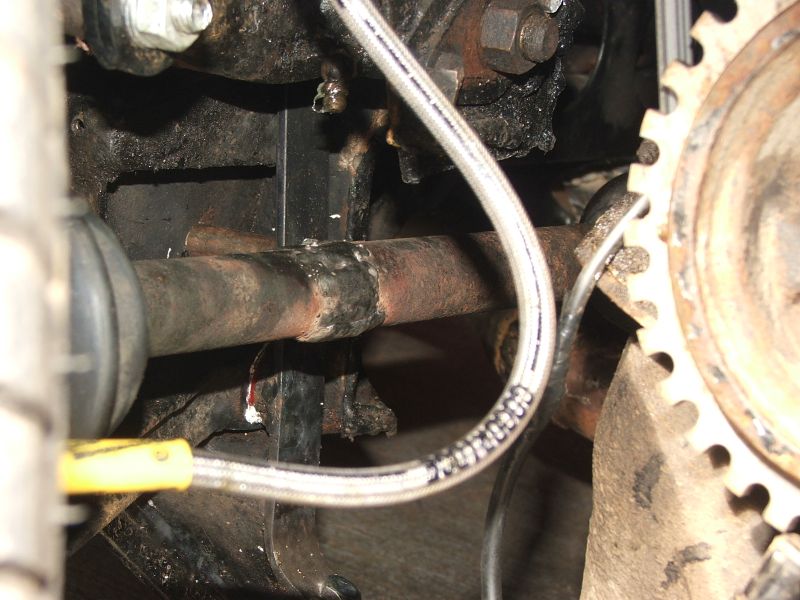
Offside shaft in position. (Don't worry, there really is plenty of space between the brake hose and choppy EDIS wheel !)
Last job:- tighten/ grease suspension & check the wheel nuts, then test drive :-)
Ok, so due to a wiggly -ve connection the Megasquirt wouldn't fire up, but after that extra last job was sorted it was test drive time.
*** ED MOVES !!! ***
10_ed_moves_1.avi Neil gets the first drive 9112kb DivX avi
OK, so the front grill rattles, the throttle return spring is too weak and the fuelling isn't mapped - but it works!
11_ed_moves_2.avi My turn. 10404kb DivX avi
Um, yup, it definitely works :-)
Felt a bit grindy under acceleration, so the box may be a bit crappy - or maybe just needs the oil checking !
Pesky alternator seems to be stuffed, so that will need sorting before any real on road tuning, but doesn't seem to major.
Good progress though (ta again Neil) so time for a relaxing pint

23rd Sept
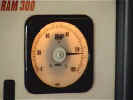
Speedo update...
Due to a bizarre twist of fate it turned out that the speedo in Ed just happened to be accurate to within a couple of MPH when connected to the MR2 gearbox :-)
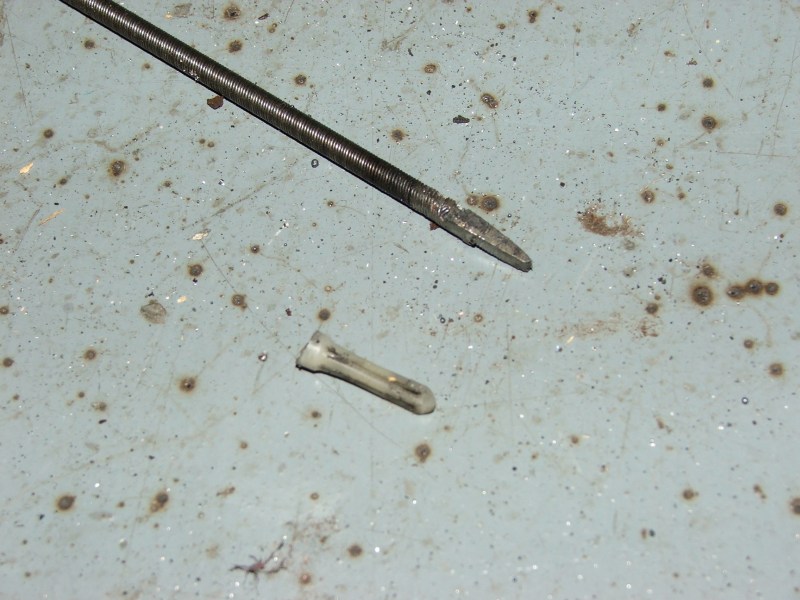
However, modifying the cable to work reliably was a bit more troublesome, but after several failed revisions it was time to get serious! I had tried epxoying the Mini square plastic end bit to the MR2 cable but it failed a couple of times, so the MIG came out and I welded a blob to the end, then filed it to shape.
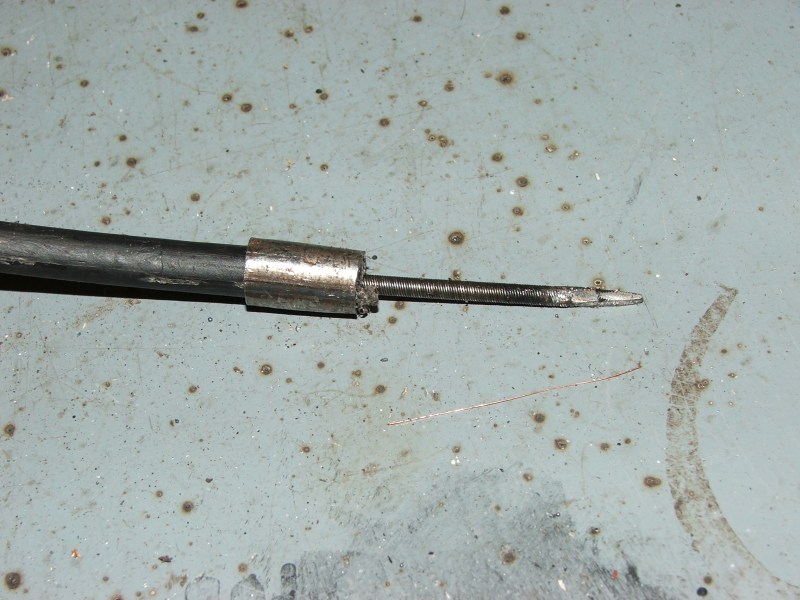
A bit of thin steel tube crimped over the end of the outer cable
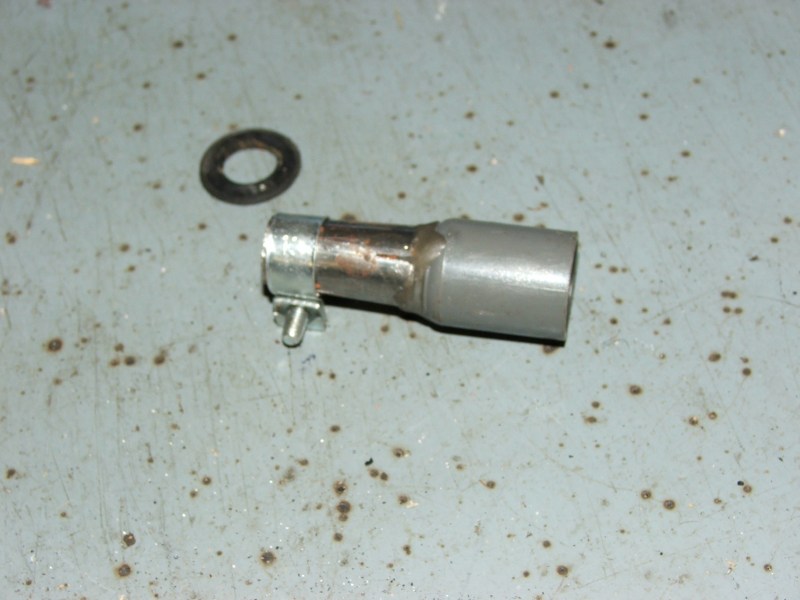
And a larger bit epoxied to the end fitting thing cut from the original Mini cable.
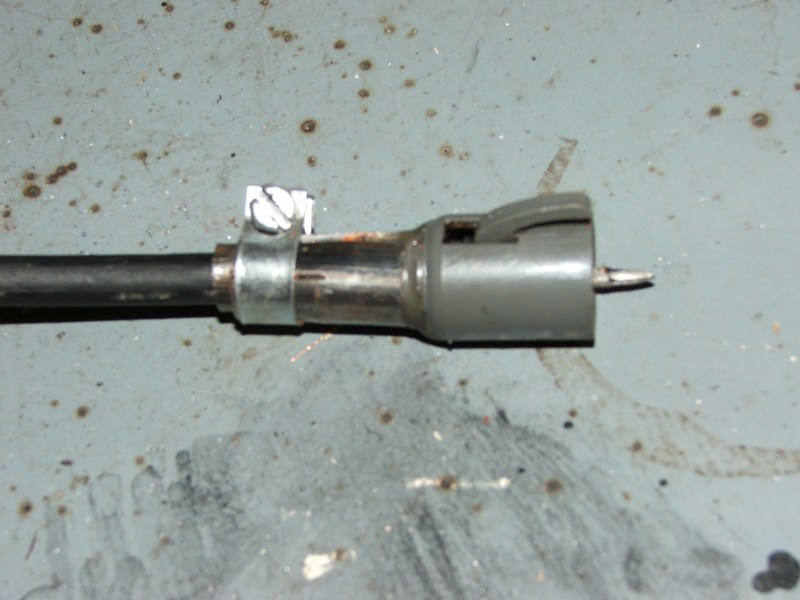
Then the whole lot just clamps together, and the length can be fine tuned for the perfect fit.
3rd Nov
Rolling road.....
Well, considering Mr Toyota claimed the engine should stick out about 125bhp (when new in 1986), we were quite pleased to find that our £50 bargain Ebay engine was putting out nearly 130 at the wheels :-)
Hooray for us, Elaine's Megasquirt tooning skills and the spagbodged 'freeflow' exhaust system!!
Actually, removing the TVIS butterfly plates has probably improved the top end a bit at the expense of a little bottom end torque.
But having said that it still has twice the torque of an A series, so there's more than enough to go round...
Peak torque 148 lbs ft @ 4000 rpm
| RPM | BHP (flywheel) |
| 3000 | 77 |
| 4000 | 108 |
| 5000 | 132 |
| 6000 | 138 |
| 6500 | 135 |
A few vids, squished with DivX
Edited highlights.
 ed01-dial1.avi 1.2mb
 ed03-short.avi 4.4mb
And here's the longer one (yawn)
 ed02-med.avi 18.2mb